 then
then  Add IMPERIAL SUGAR to Home Screen
How To Make Back-To-School Apple Decorated Sugar Cookies
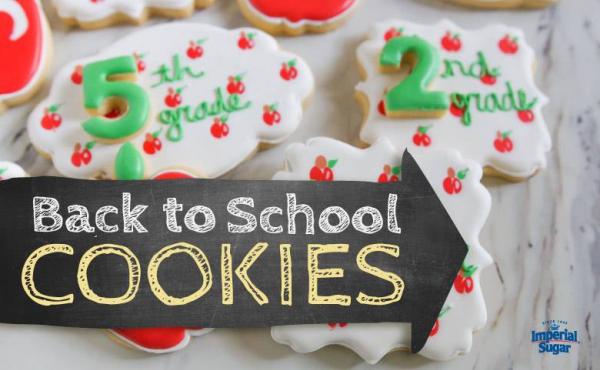
Our friend and brand ambassador Bridget Edwards is here to help us get back-to-school in style with this recipe for Apple Decorated Sugar Cookies. Be the apple of your favorite teacher's eye with these homemade sweet treats.
And now, here's Bridget from Bake at 350 !
Back-to-school and apples go hand-in-hand. Apple for the teacher’s desk, apple in a lunchbox, apples on cookies – it’s apple time.
These cookies feature “toothpick apples,” that is, the apple design is all accomplished with dots of icing and a toothpick. The class grade adds a small additional cookie on top. I like to call these double-decker cookies. They’re the best because you get two cookies in one.
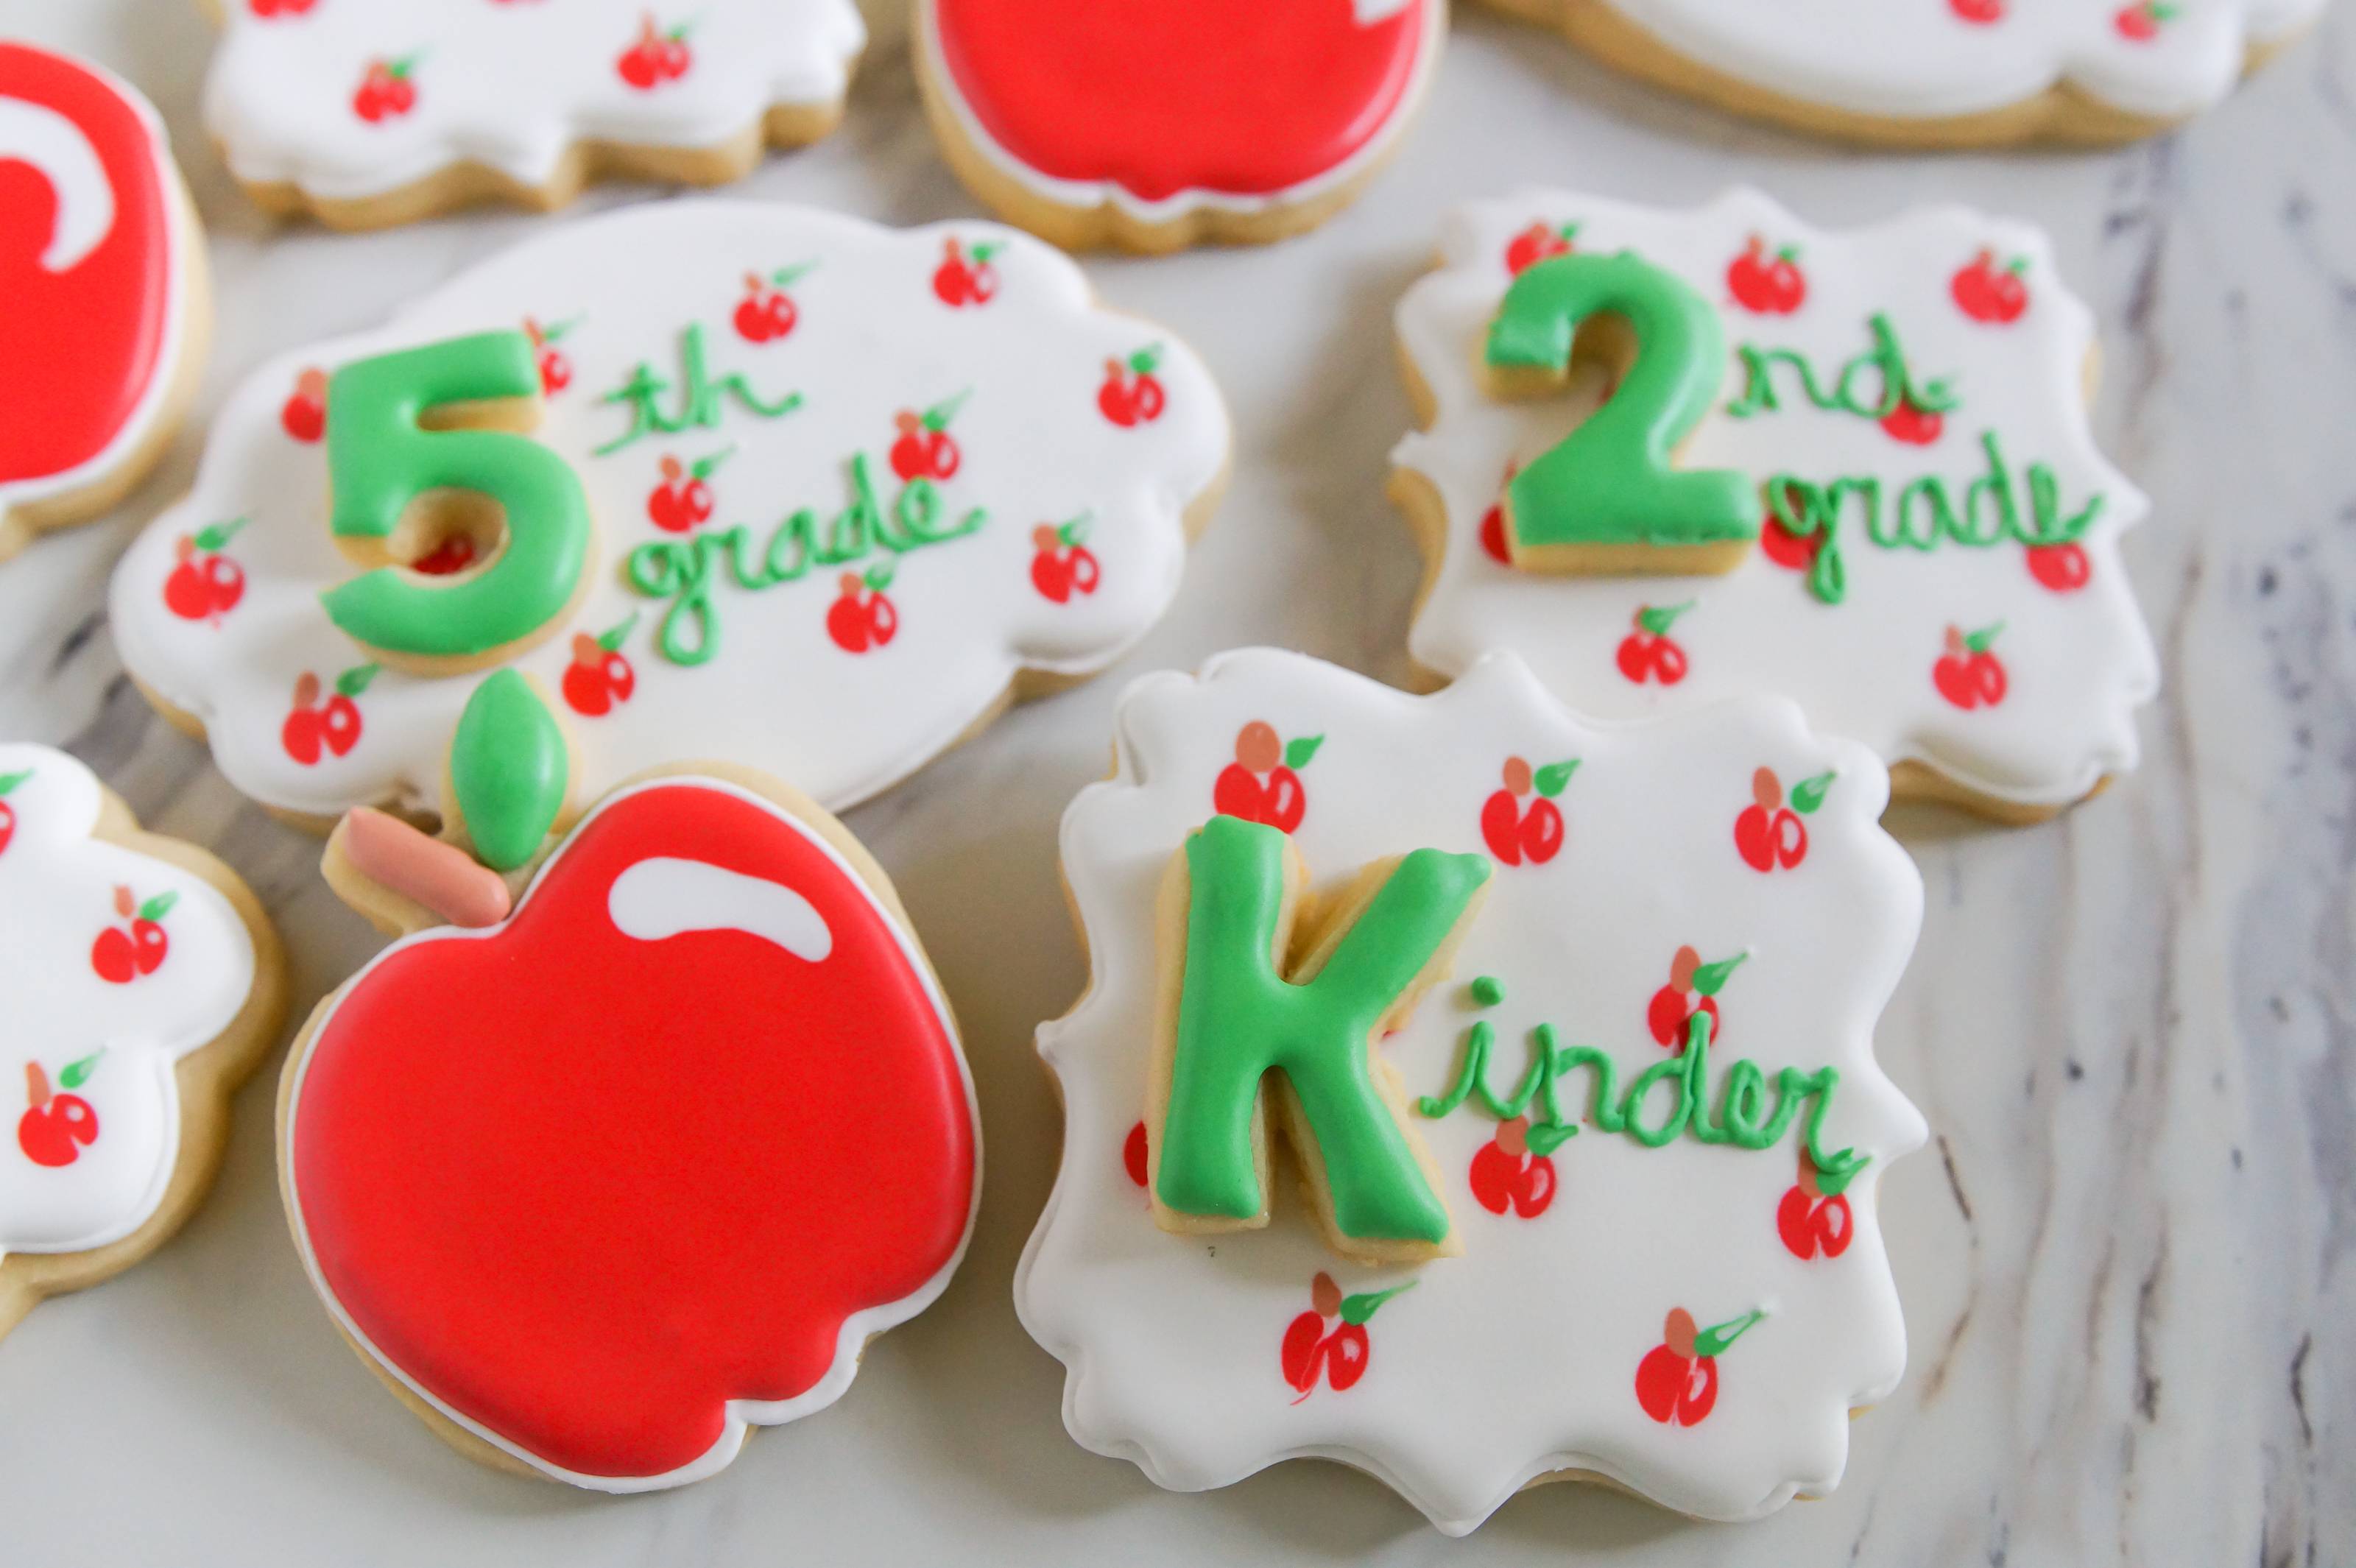
Bright and cheery, these cookies are also customizable in many ways. Add whatever grades you’d like on the top. Swap out the number and add the student’s (or teacher’s) name, or leave them plain with just the apples.
Here’s what you’ll need:
- Imperial Sugar Cut-Out Cookie recipe
- Imperial Sugar Royal Icing recipe
- Cookie cutters: plaque, circles, ovals, or squares (really, anything goes here), and numbers corresponding to the grade
- Gel paste food colorings: white, green, red, and brown
- Piping bags
- Squeeze bottles
- Icing couplers and tips: #2 and #1
- Toothpicks (lots of toothpicks)
To decorate the cookies, divide and tint the royal icing. How much you’ll need will depend on how many cookies you’re making and how big they are. I suggest doubling the recipe for a dozen-ish cookies. Cover the icing with plastic wrap pressed onto the icing.
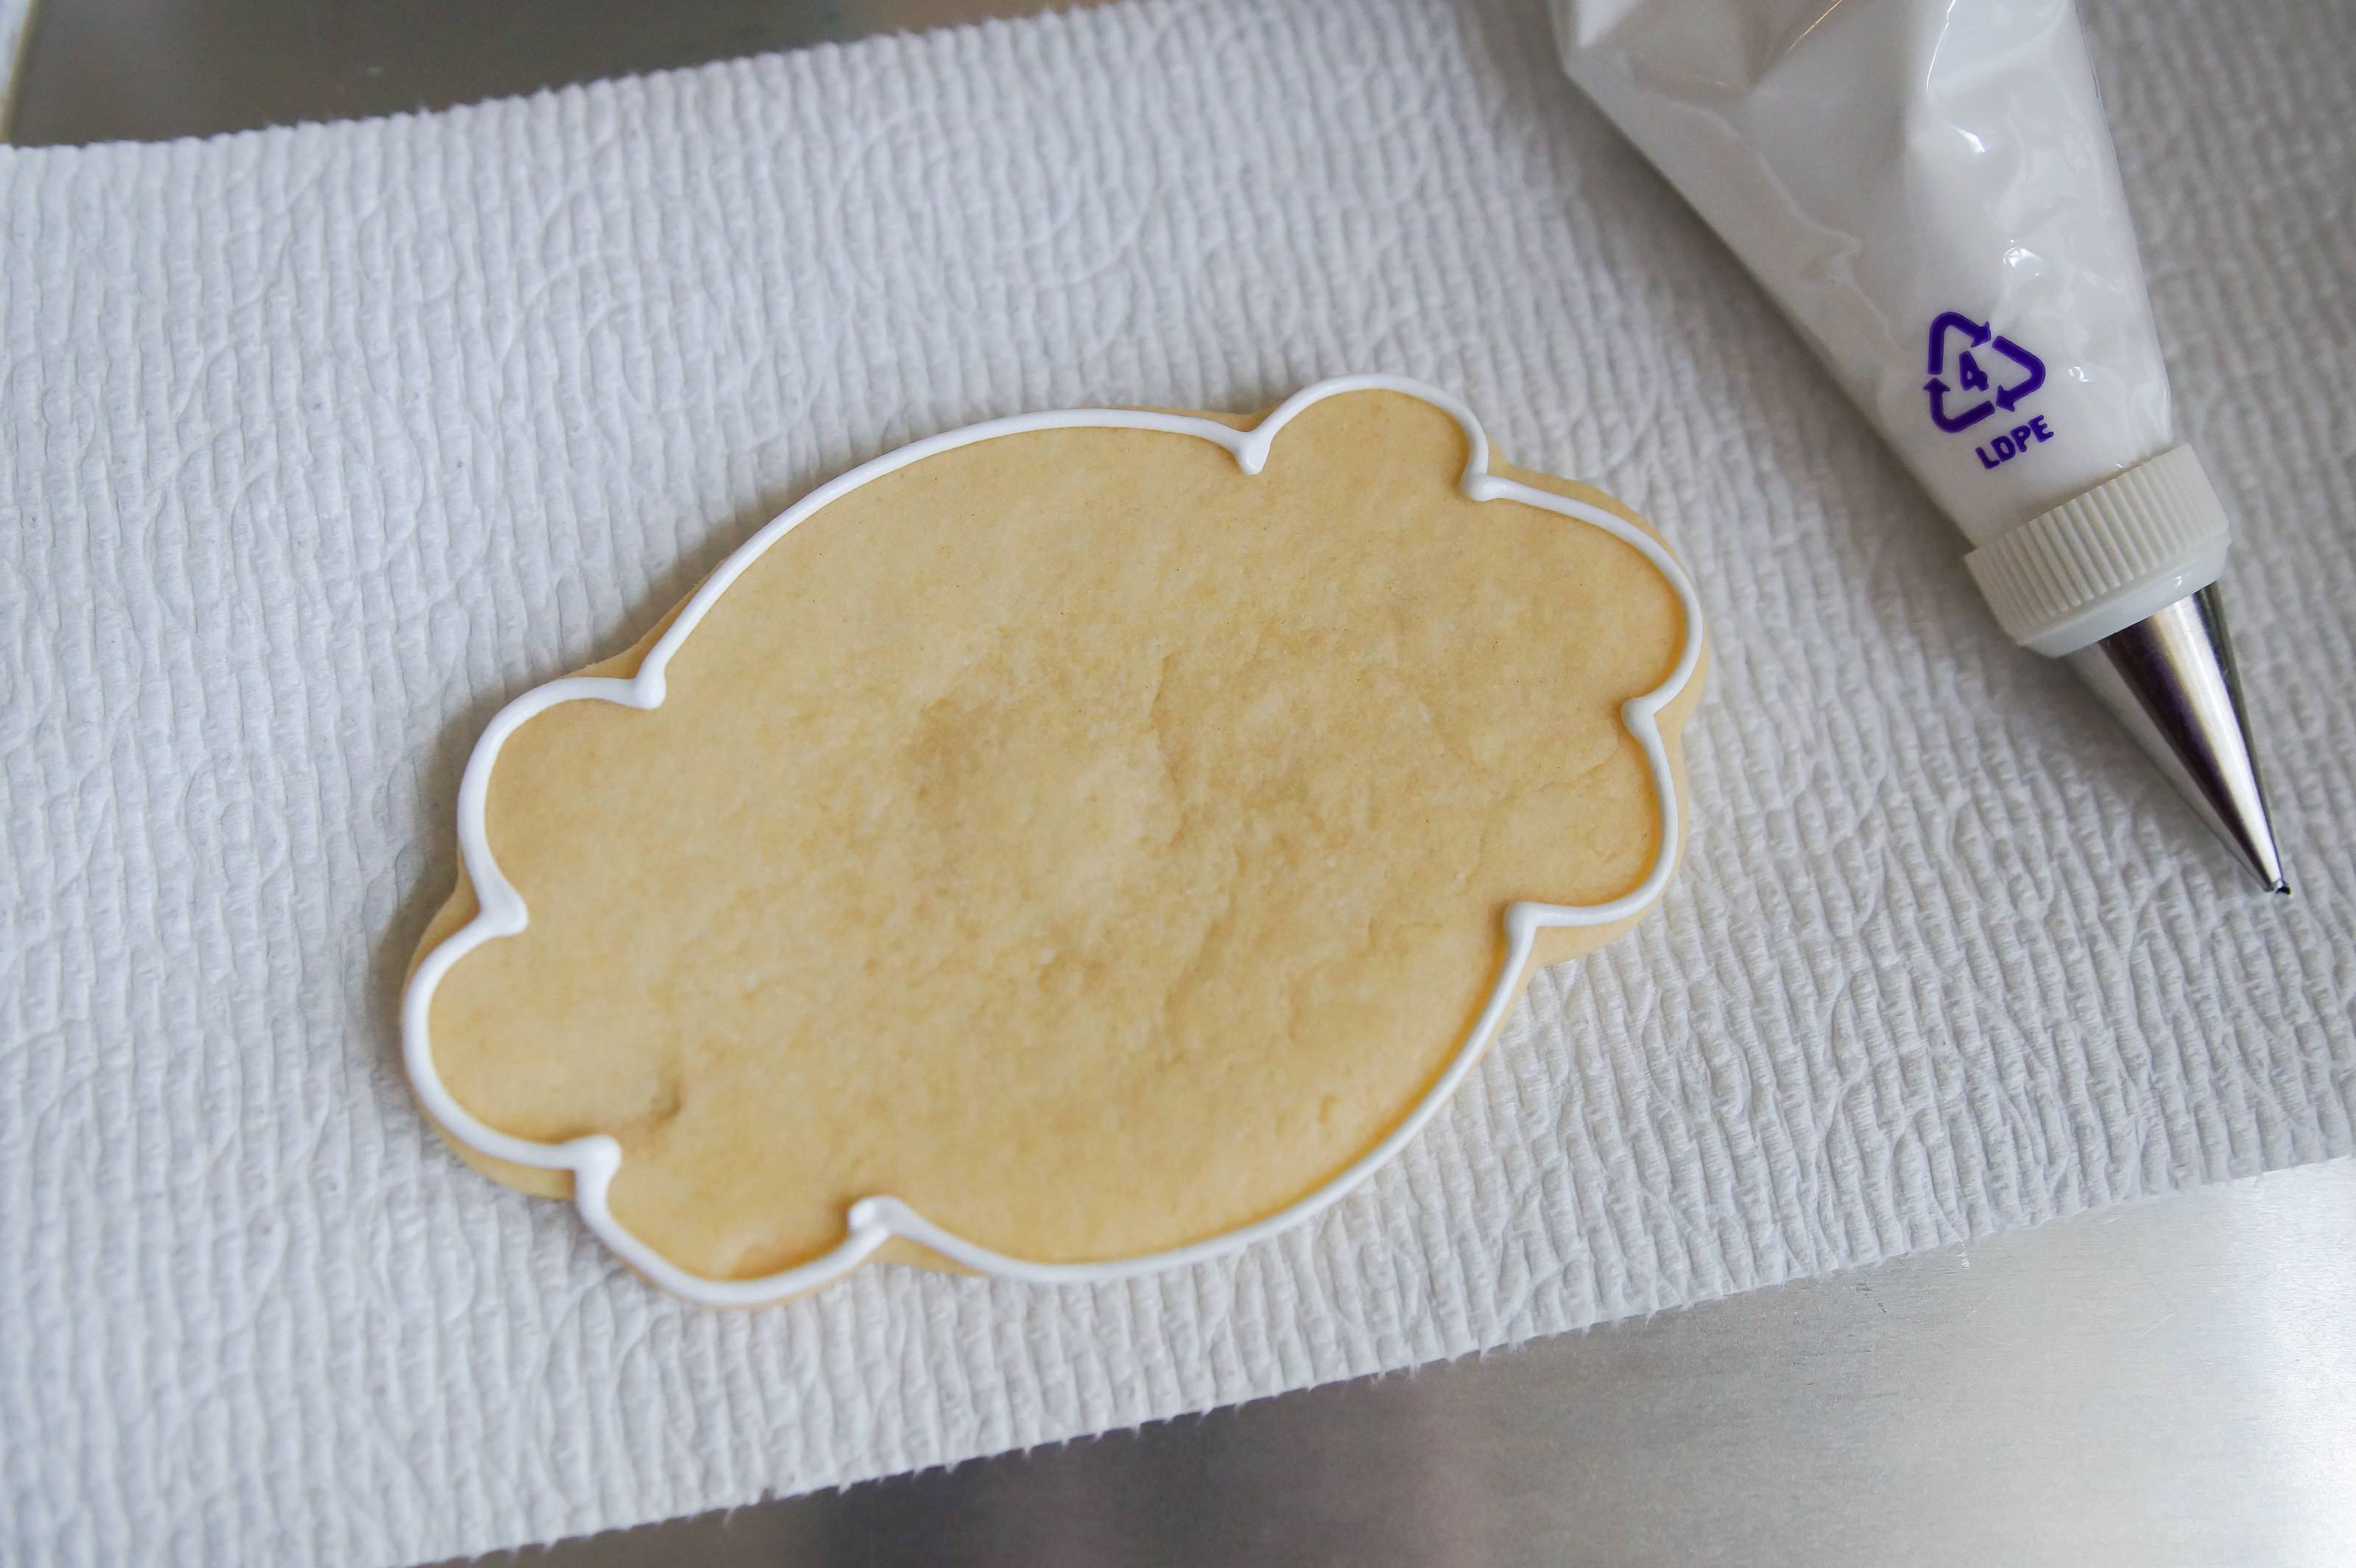
Place white icing in a bag fitted with a #2 tip. Outline the cookies.
Reserve some of the piping consistency green icing and refrigerate. Thin all of the icings with water, a bit at a time, stirring gently with a spatula until the icing is the consistency of a thick syrup. When a ribbon of icing is dropped back into the bowl, it should disappear in a count of “one-thousand-one, one-thousand-two.” One-thousand-three is ok, but if the icing is over-thinned, it can cause problems. If too thin, add in sifted powdered sugar to thicken.
Cover the bowls with a damp dish towel and let set for several minutes. Stir gently to pop any large air bubbles and transfer all except the green to squeeze bottles. Alternatively, put the white in a squeeze bottle and the other colors in disposable piping bags. Snip the tips of the piping bags.
With the green thinned icing still in the bowl, dip the number cookies into the icing. Use a toothpick if needed to pop air bubbles. Set aside to dry. Pour remaining green icing into squeeze bottle or piping bag.
Working two cookies at a time, fill in the cookies with white icing. Use a toothpick to guide to edges and pop any large air bubbles.
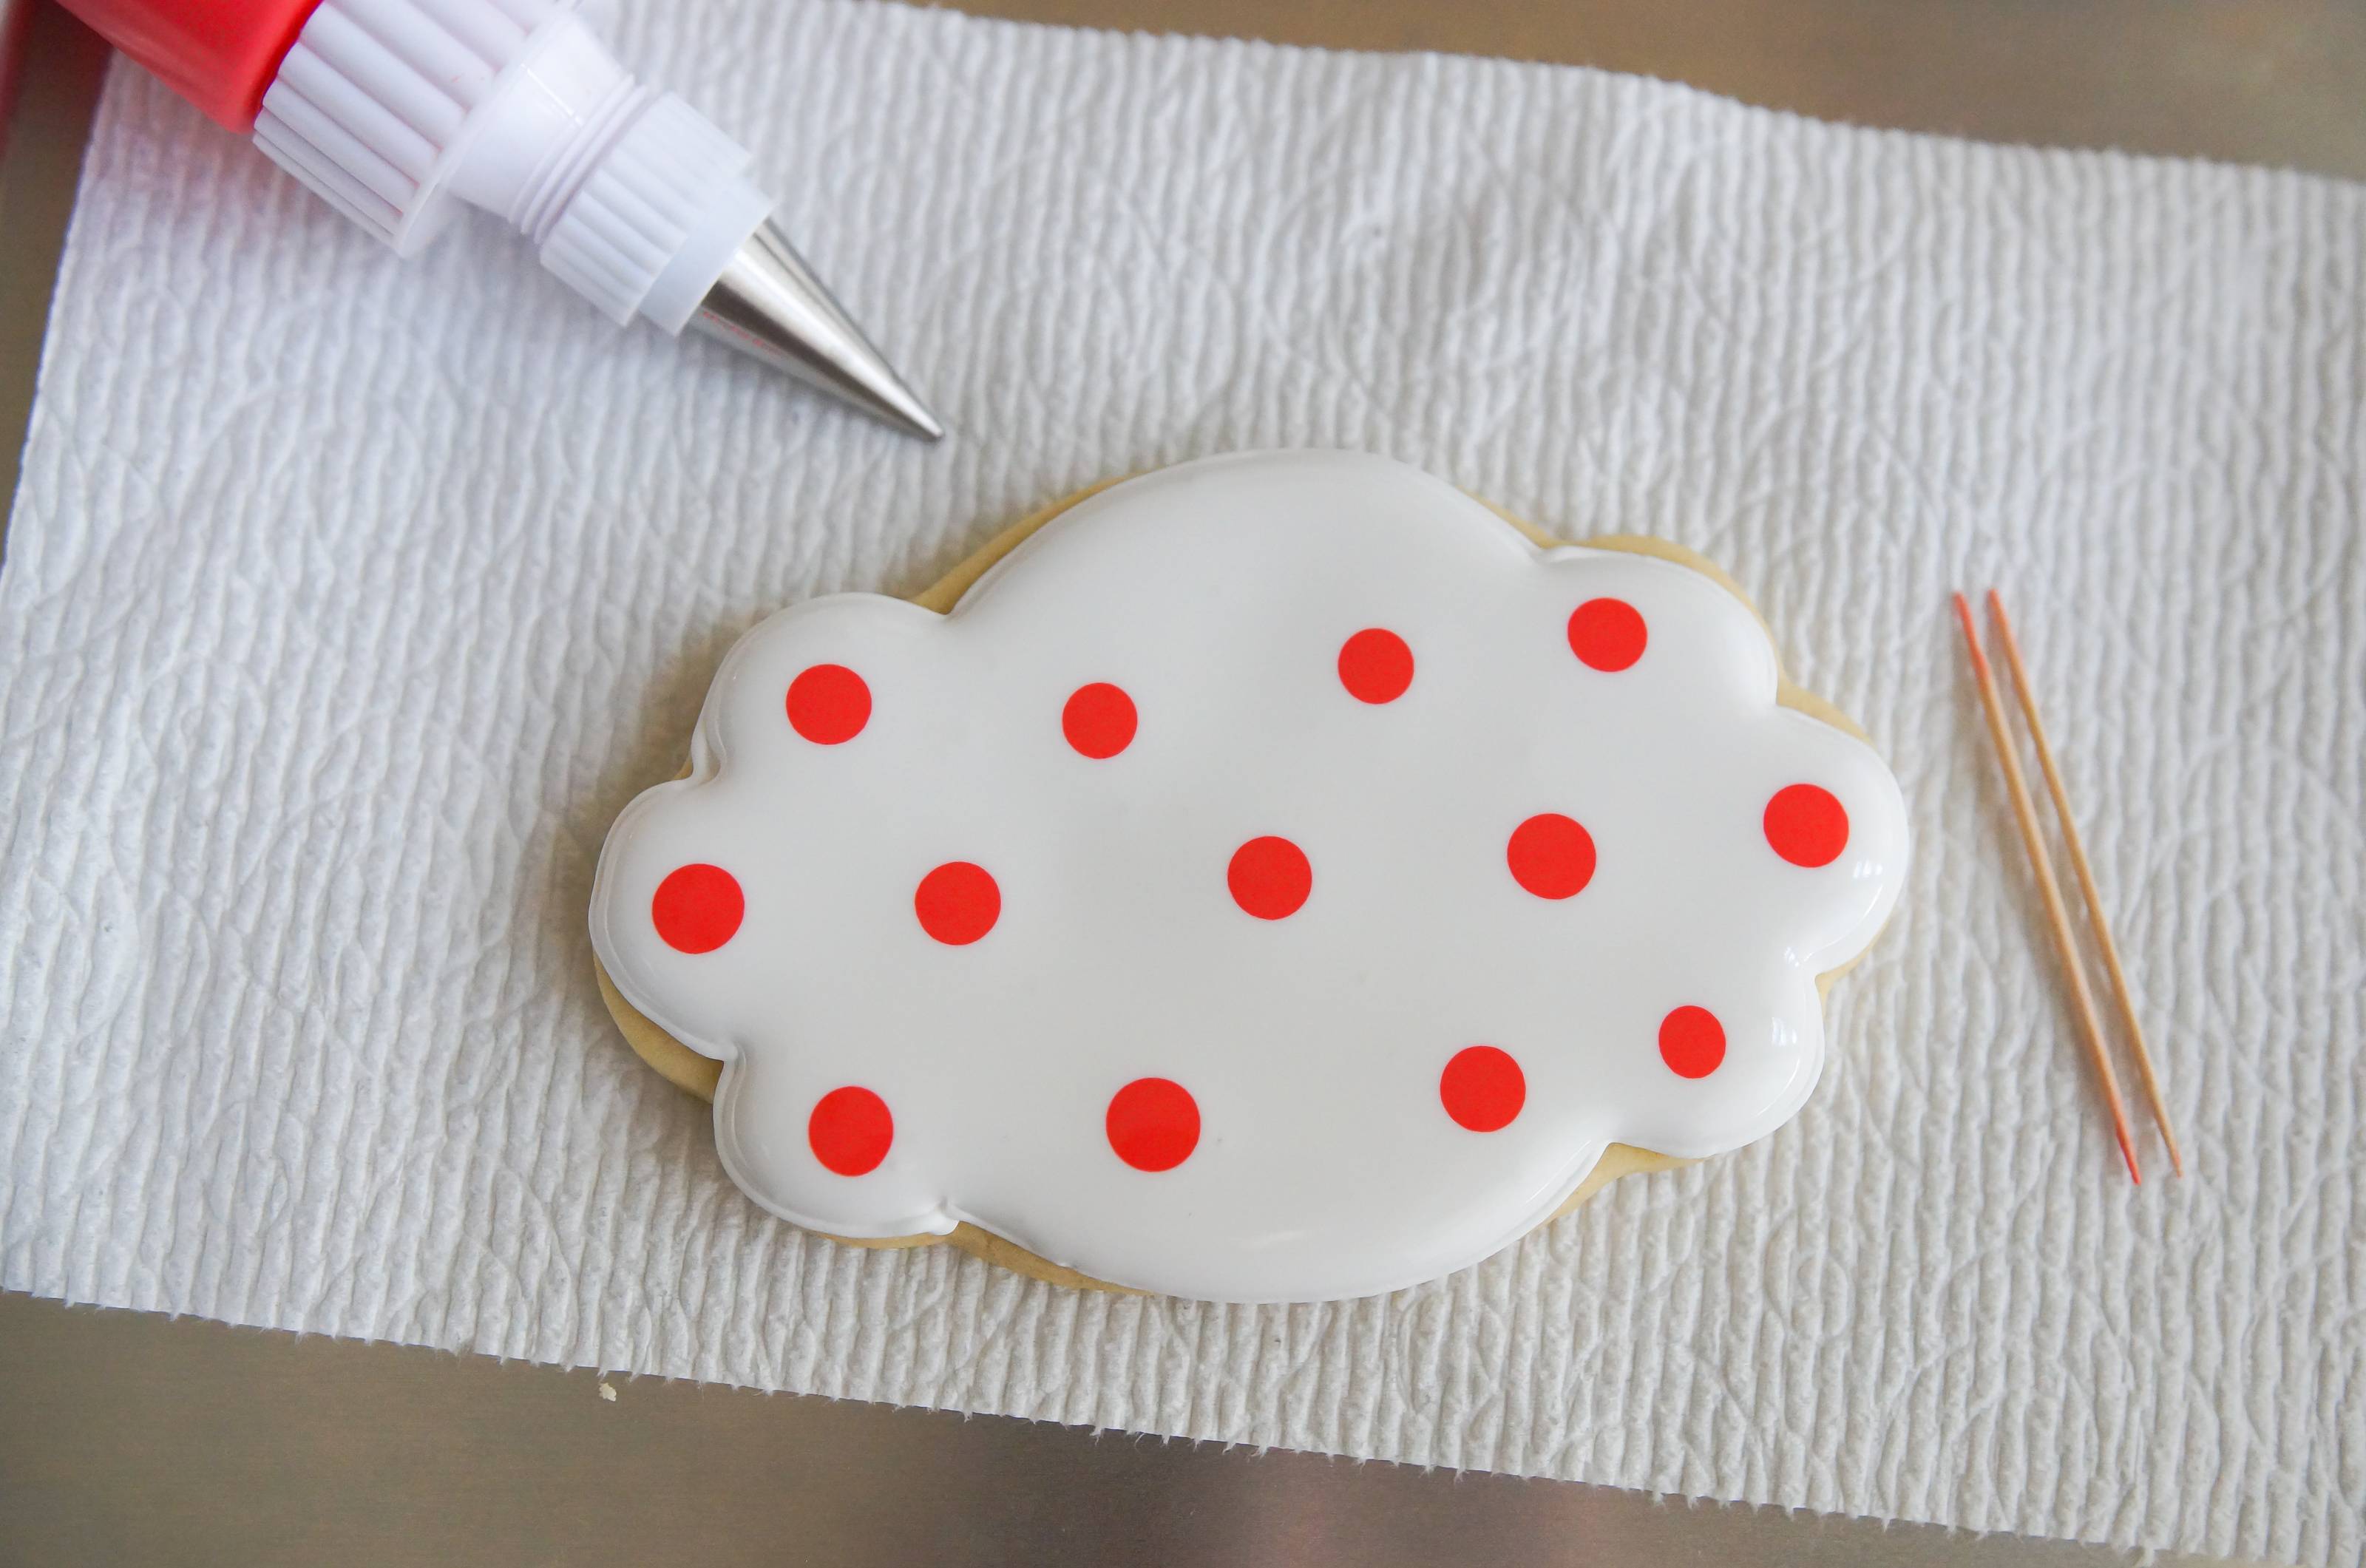
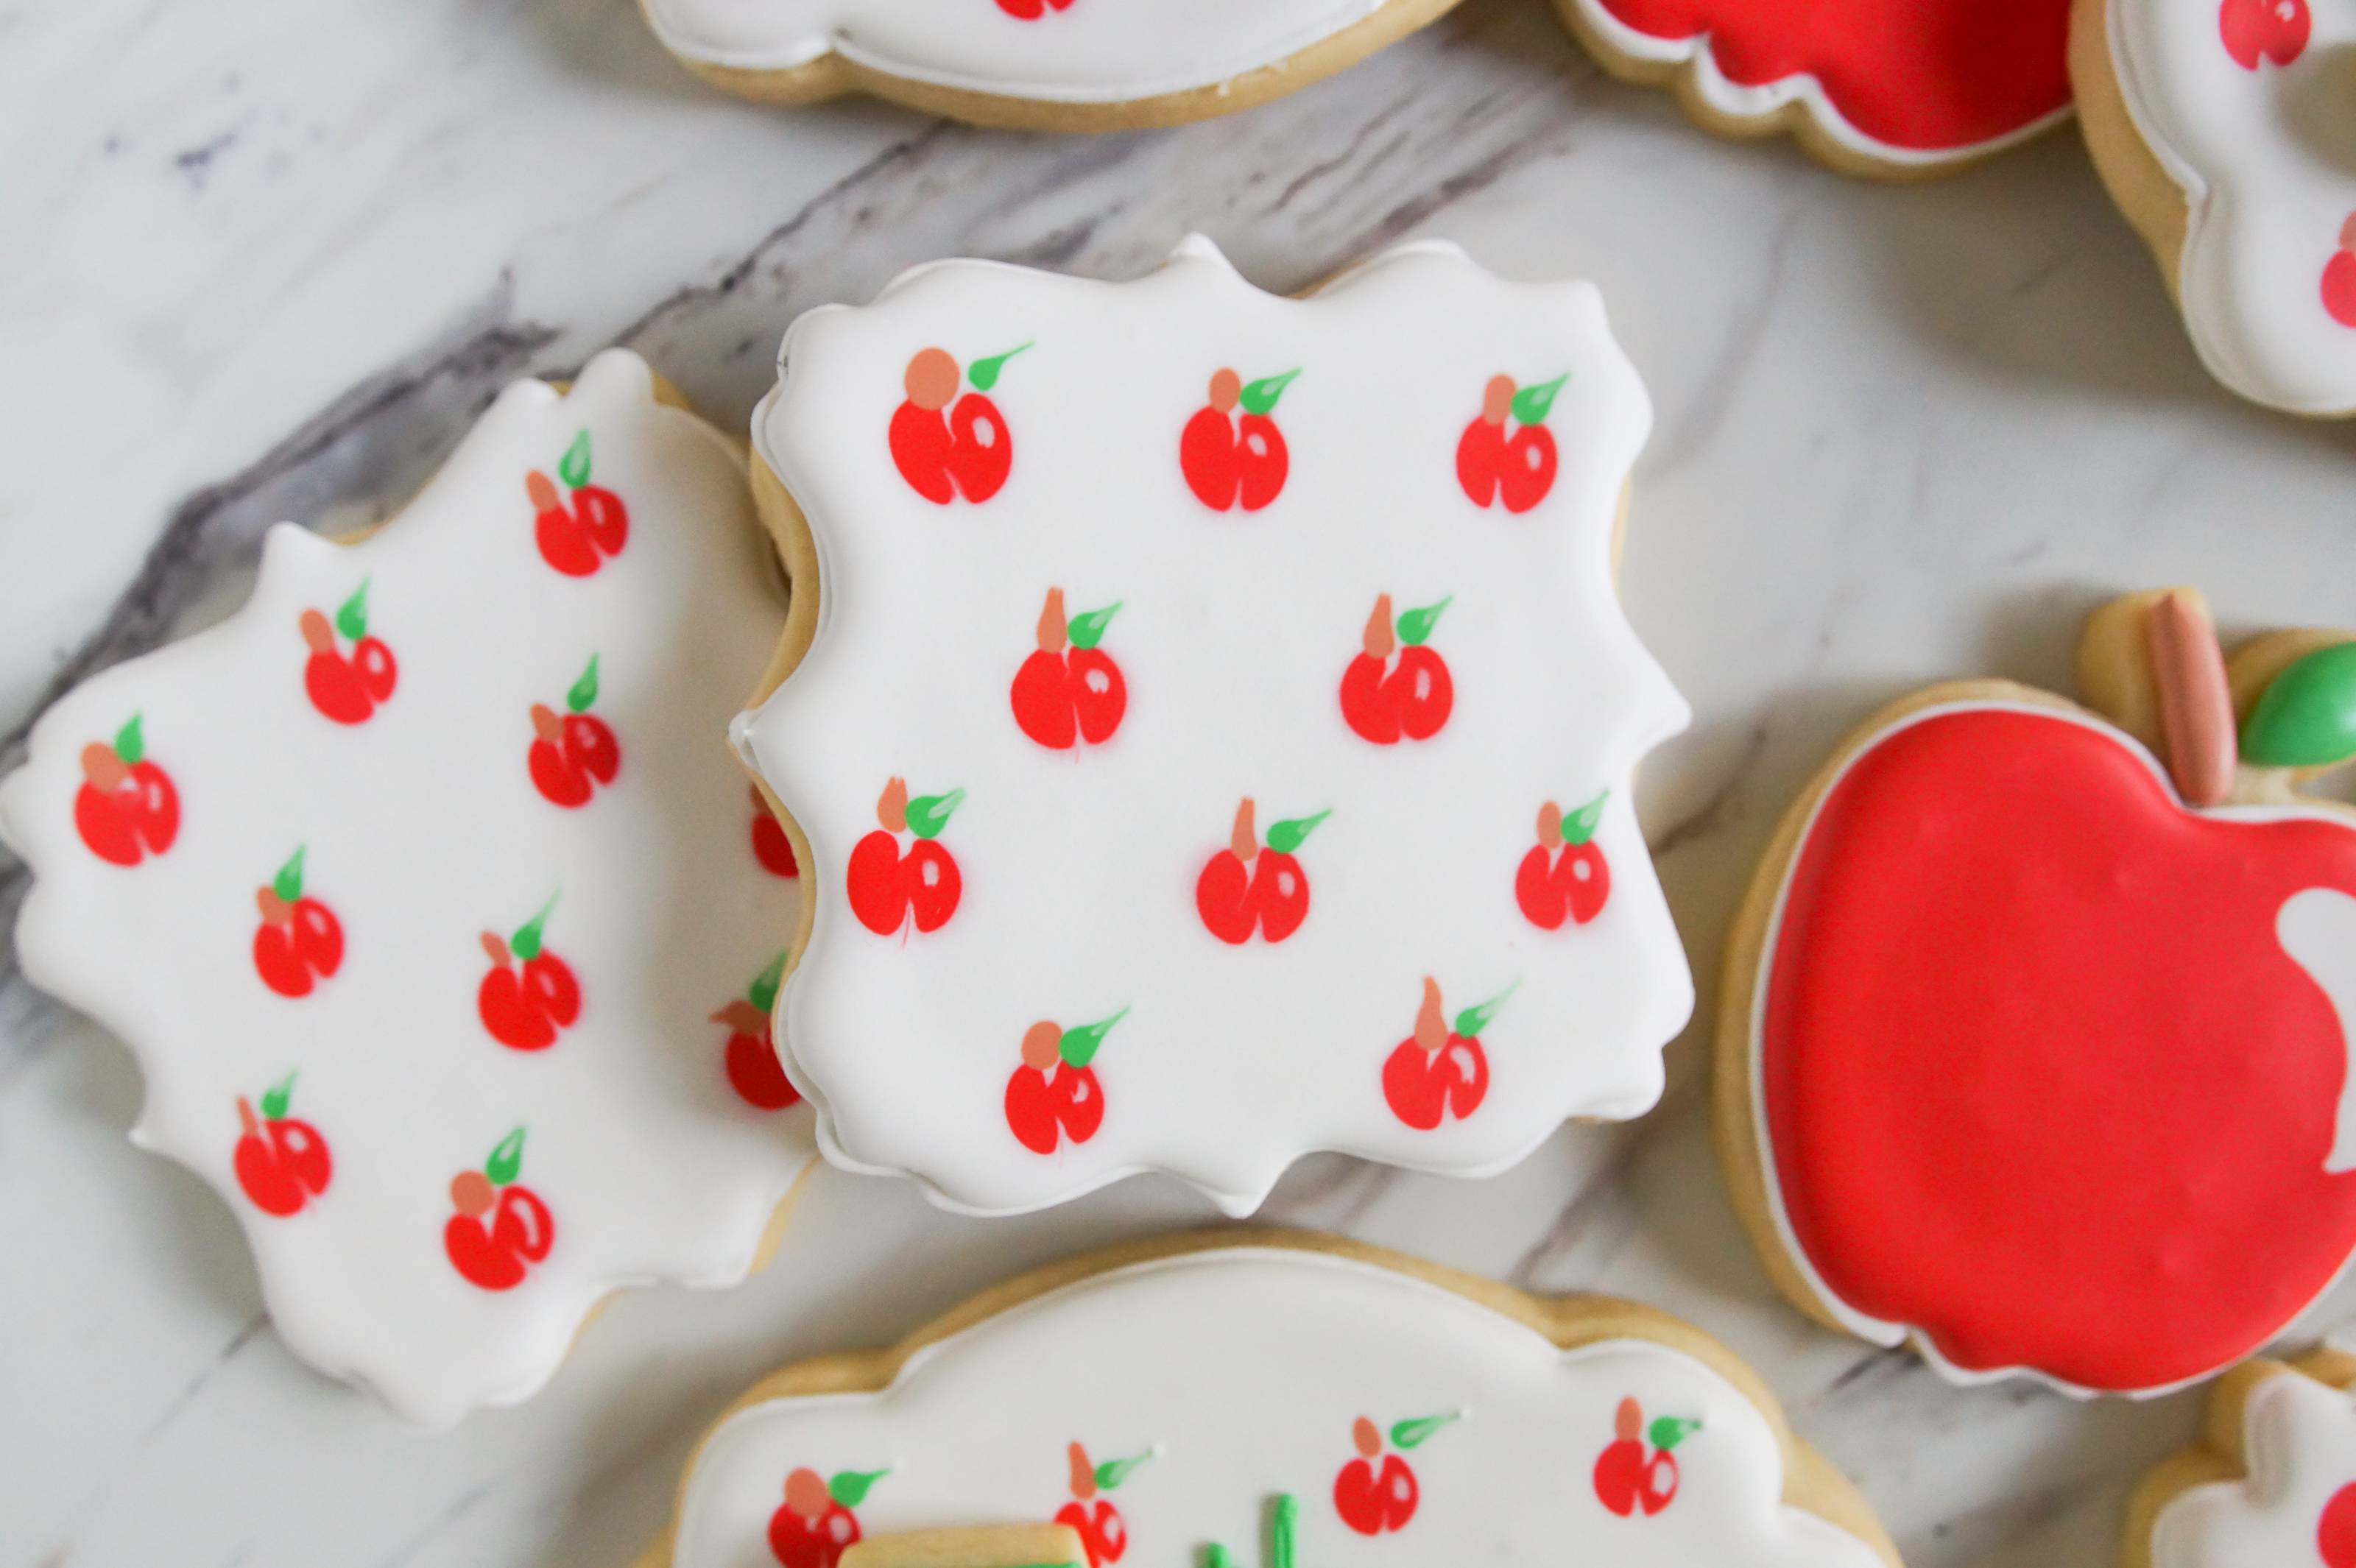
Starting with the first cookie filled, drop on dots of red icing.
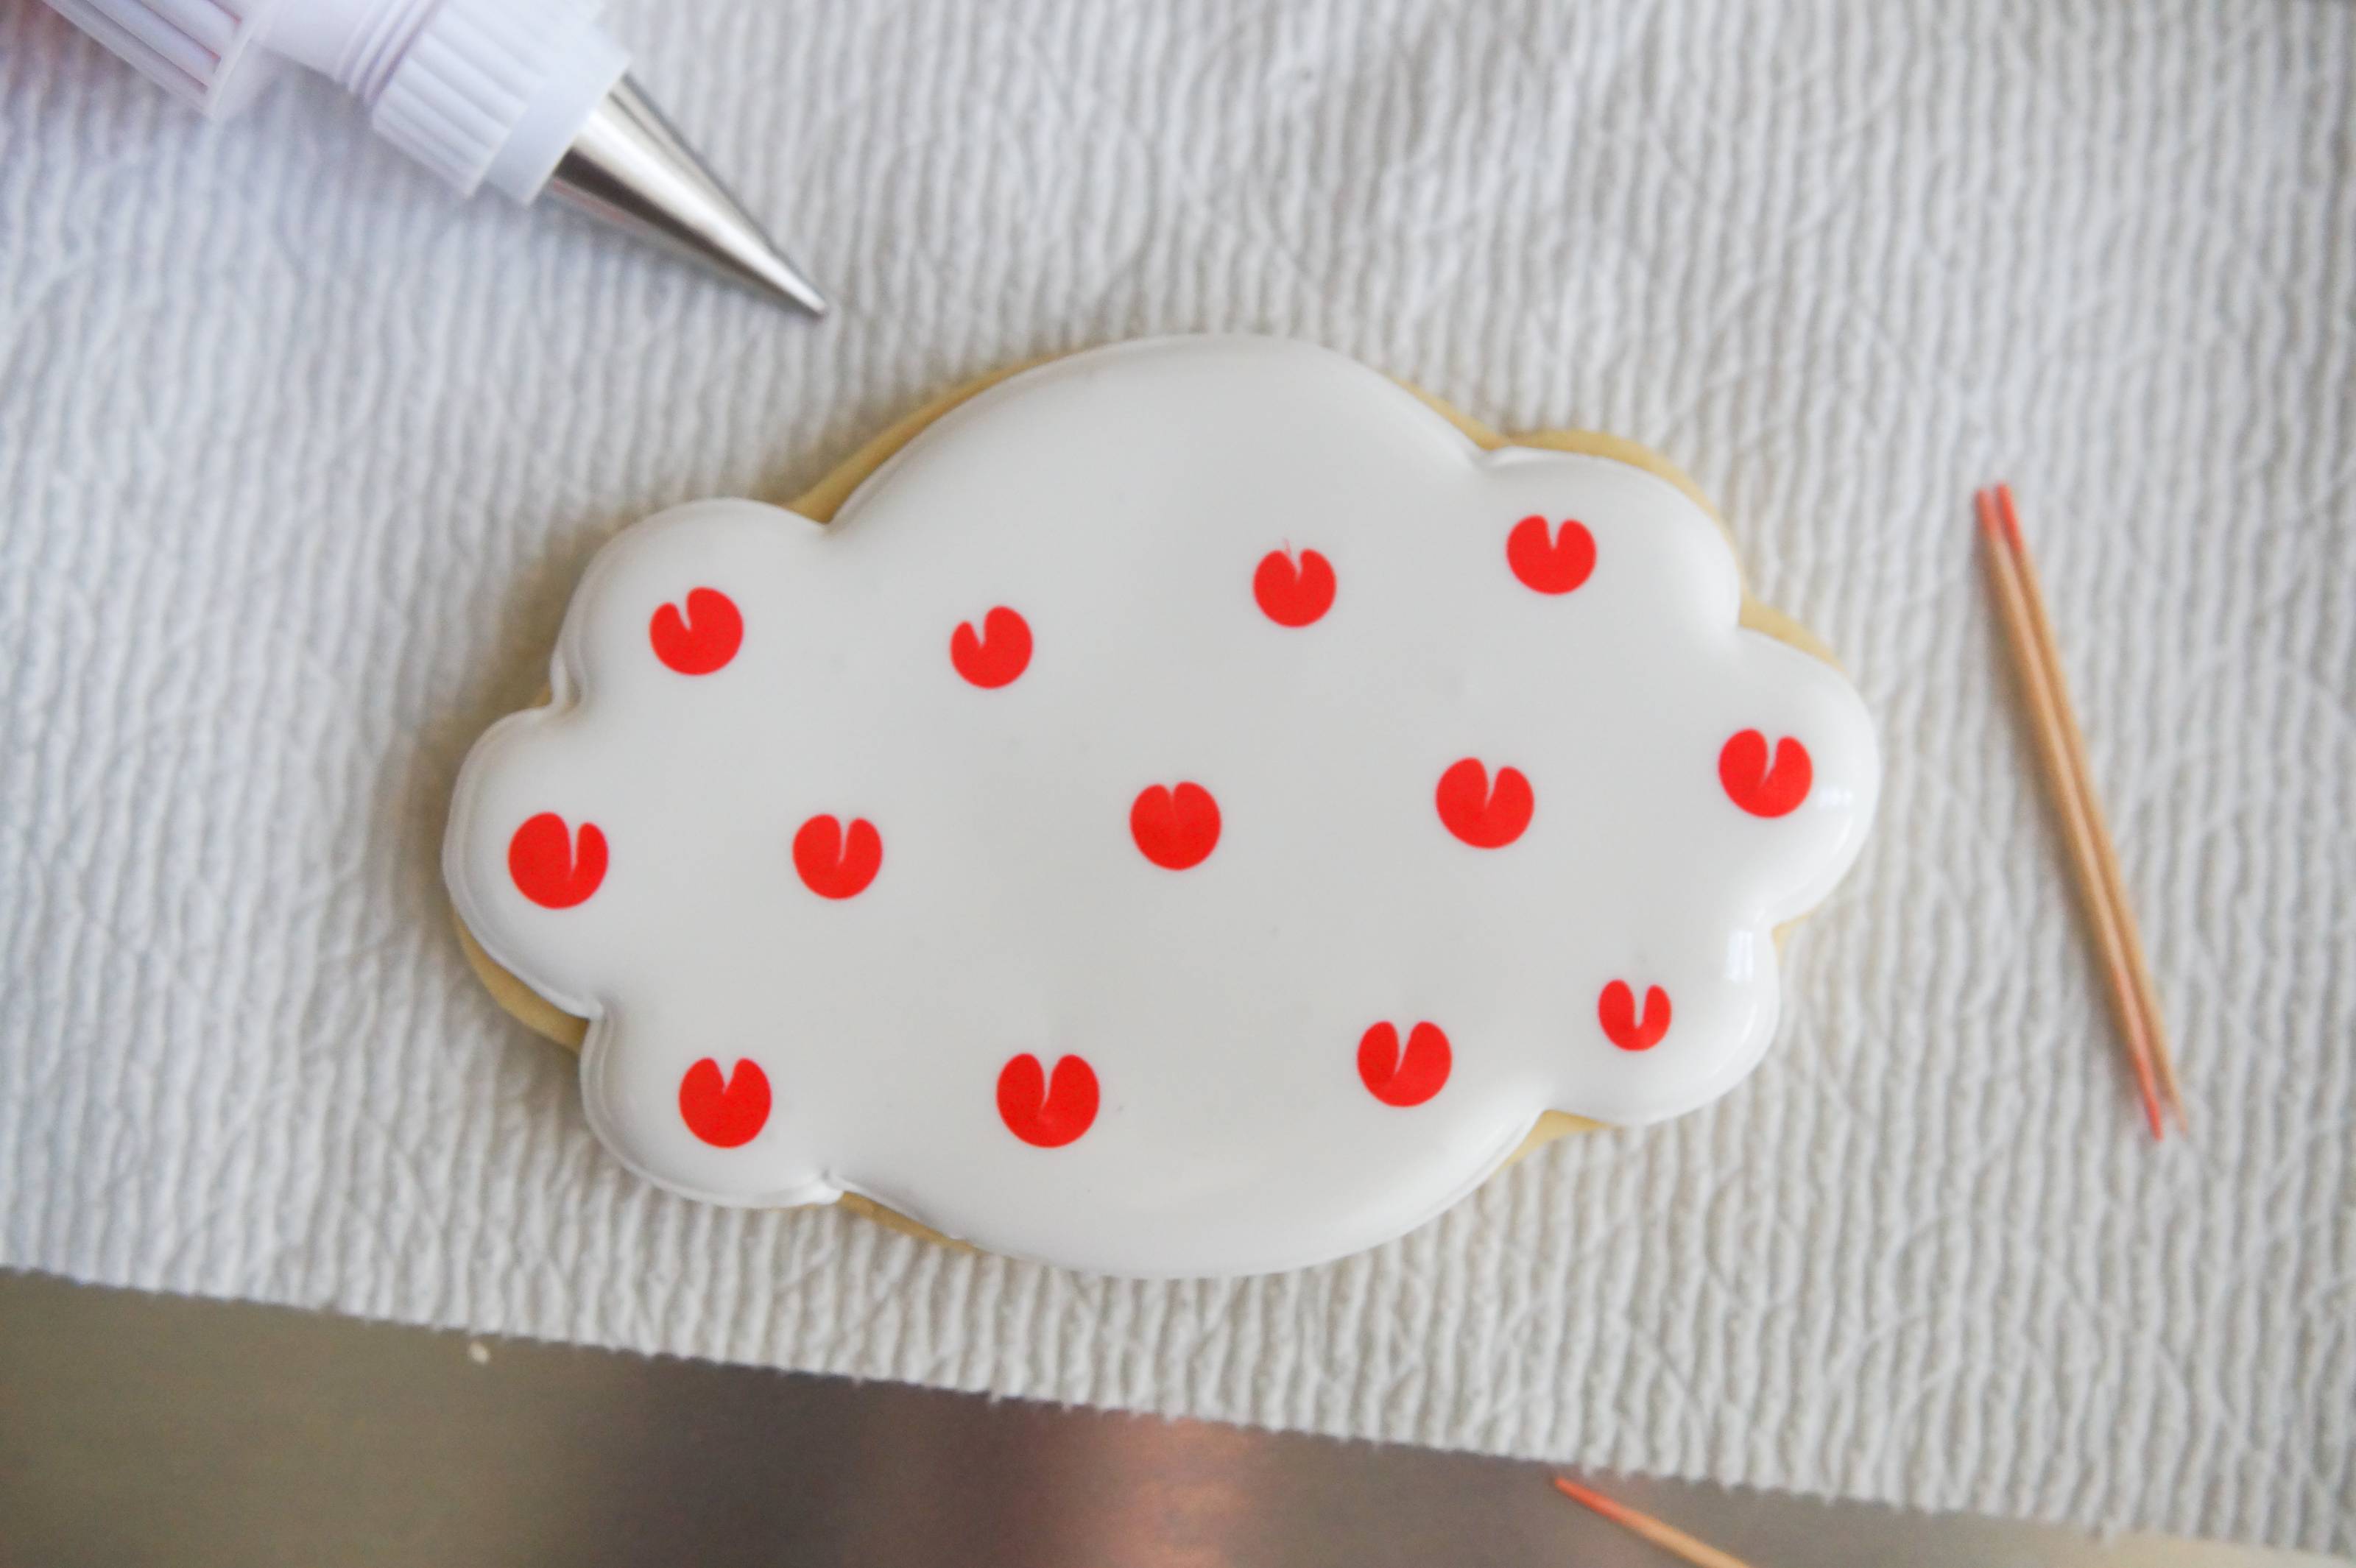
Use a toothpick to drag through the top and bottom of each apple, making an apple shape. Wipe the toothpick after each swipe to avoid dragging red through the white.
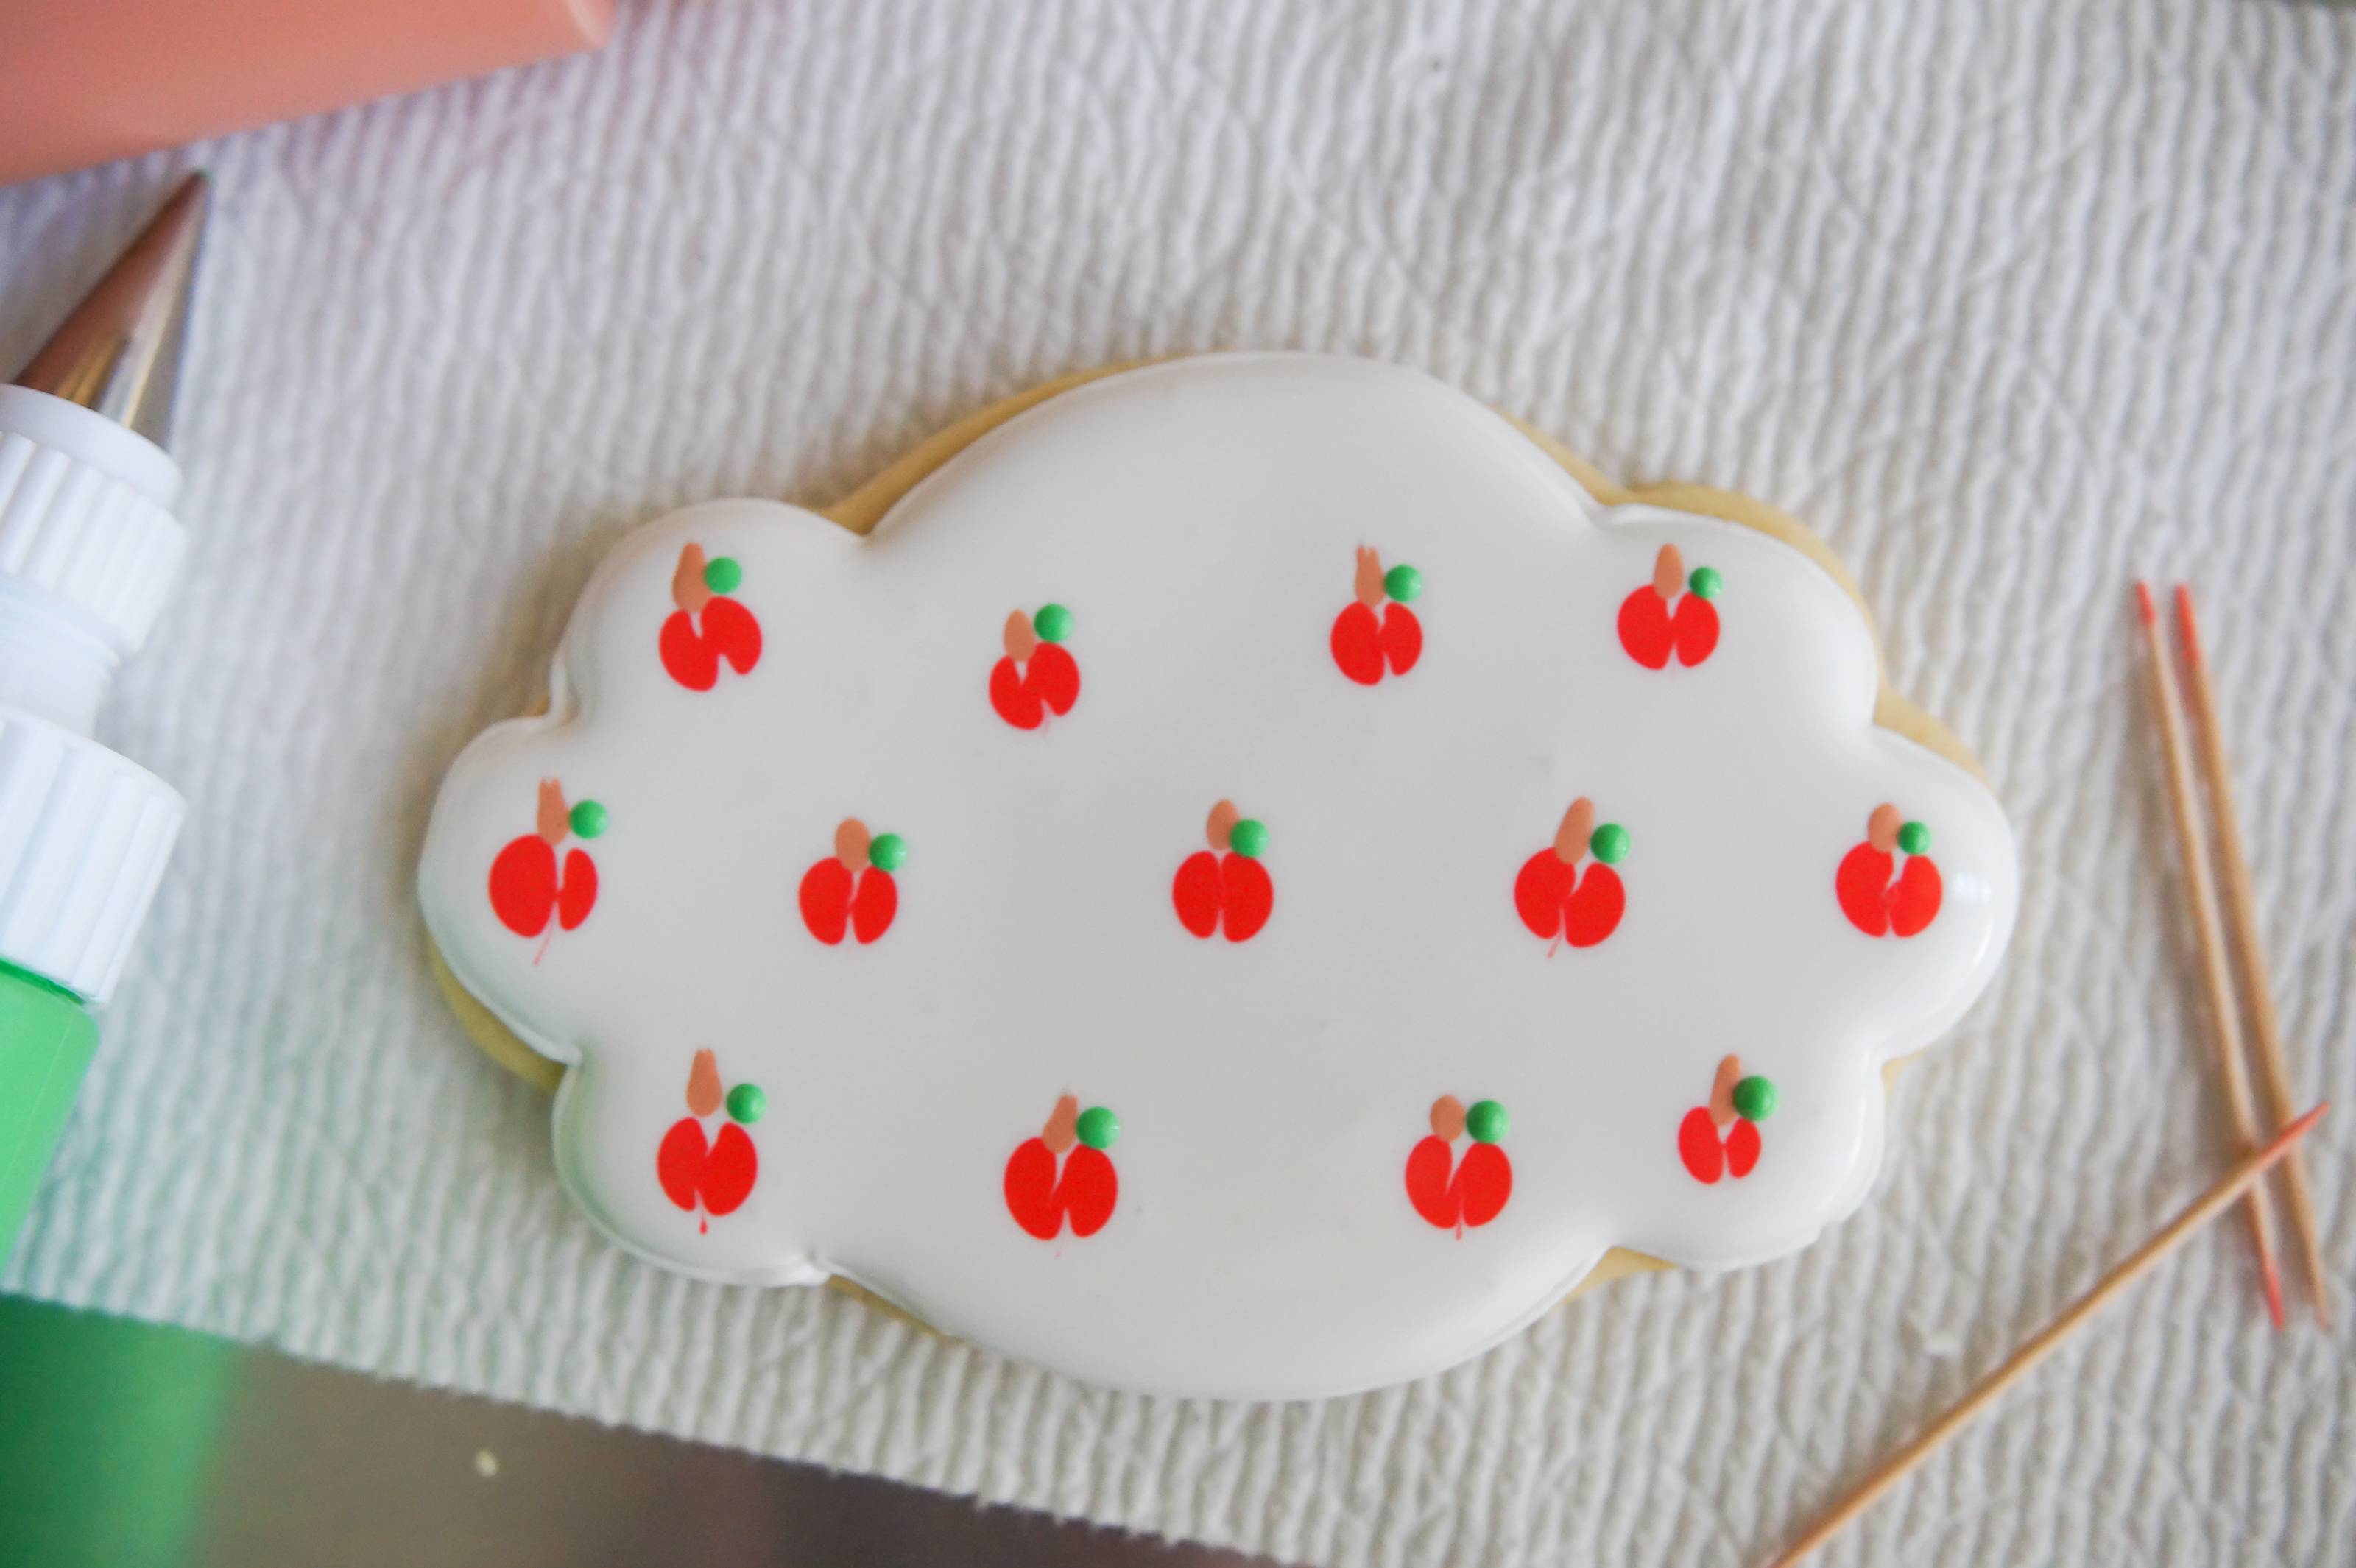
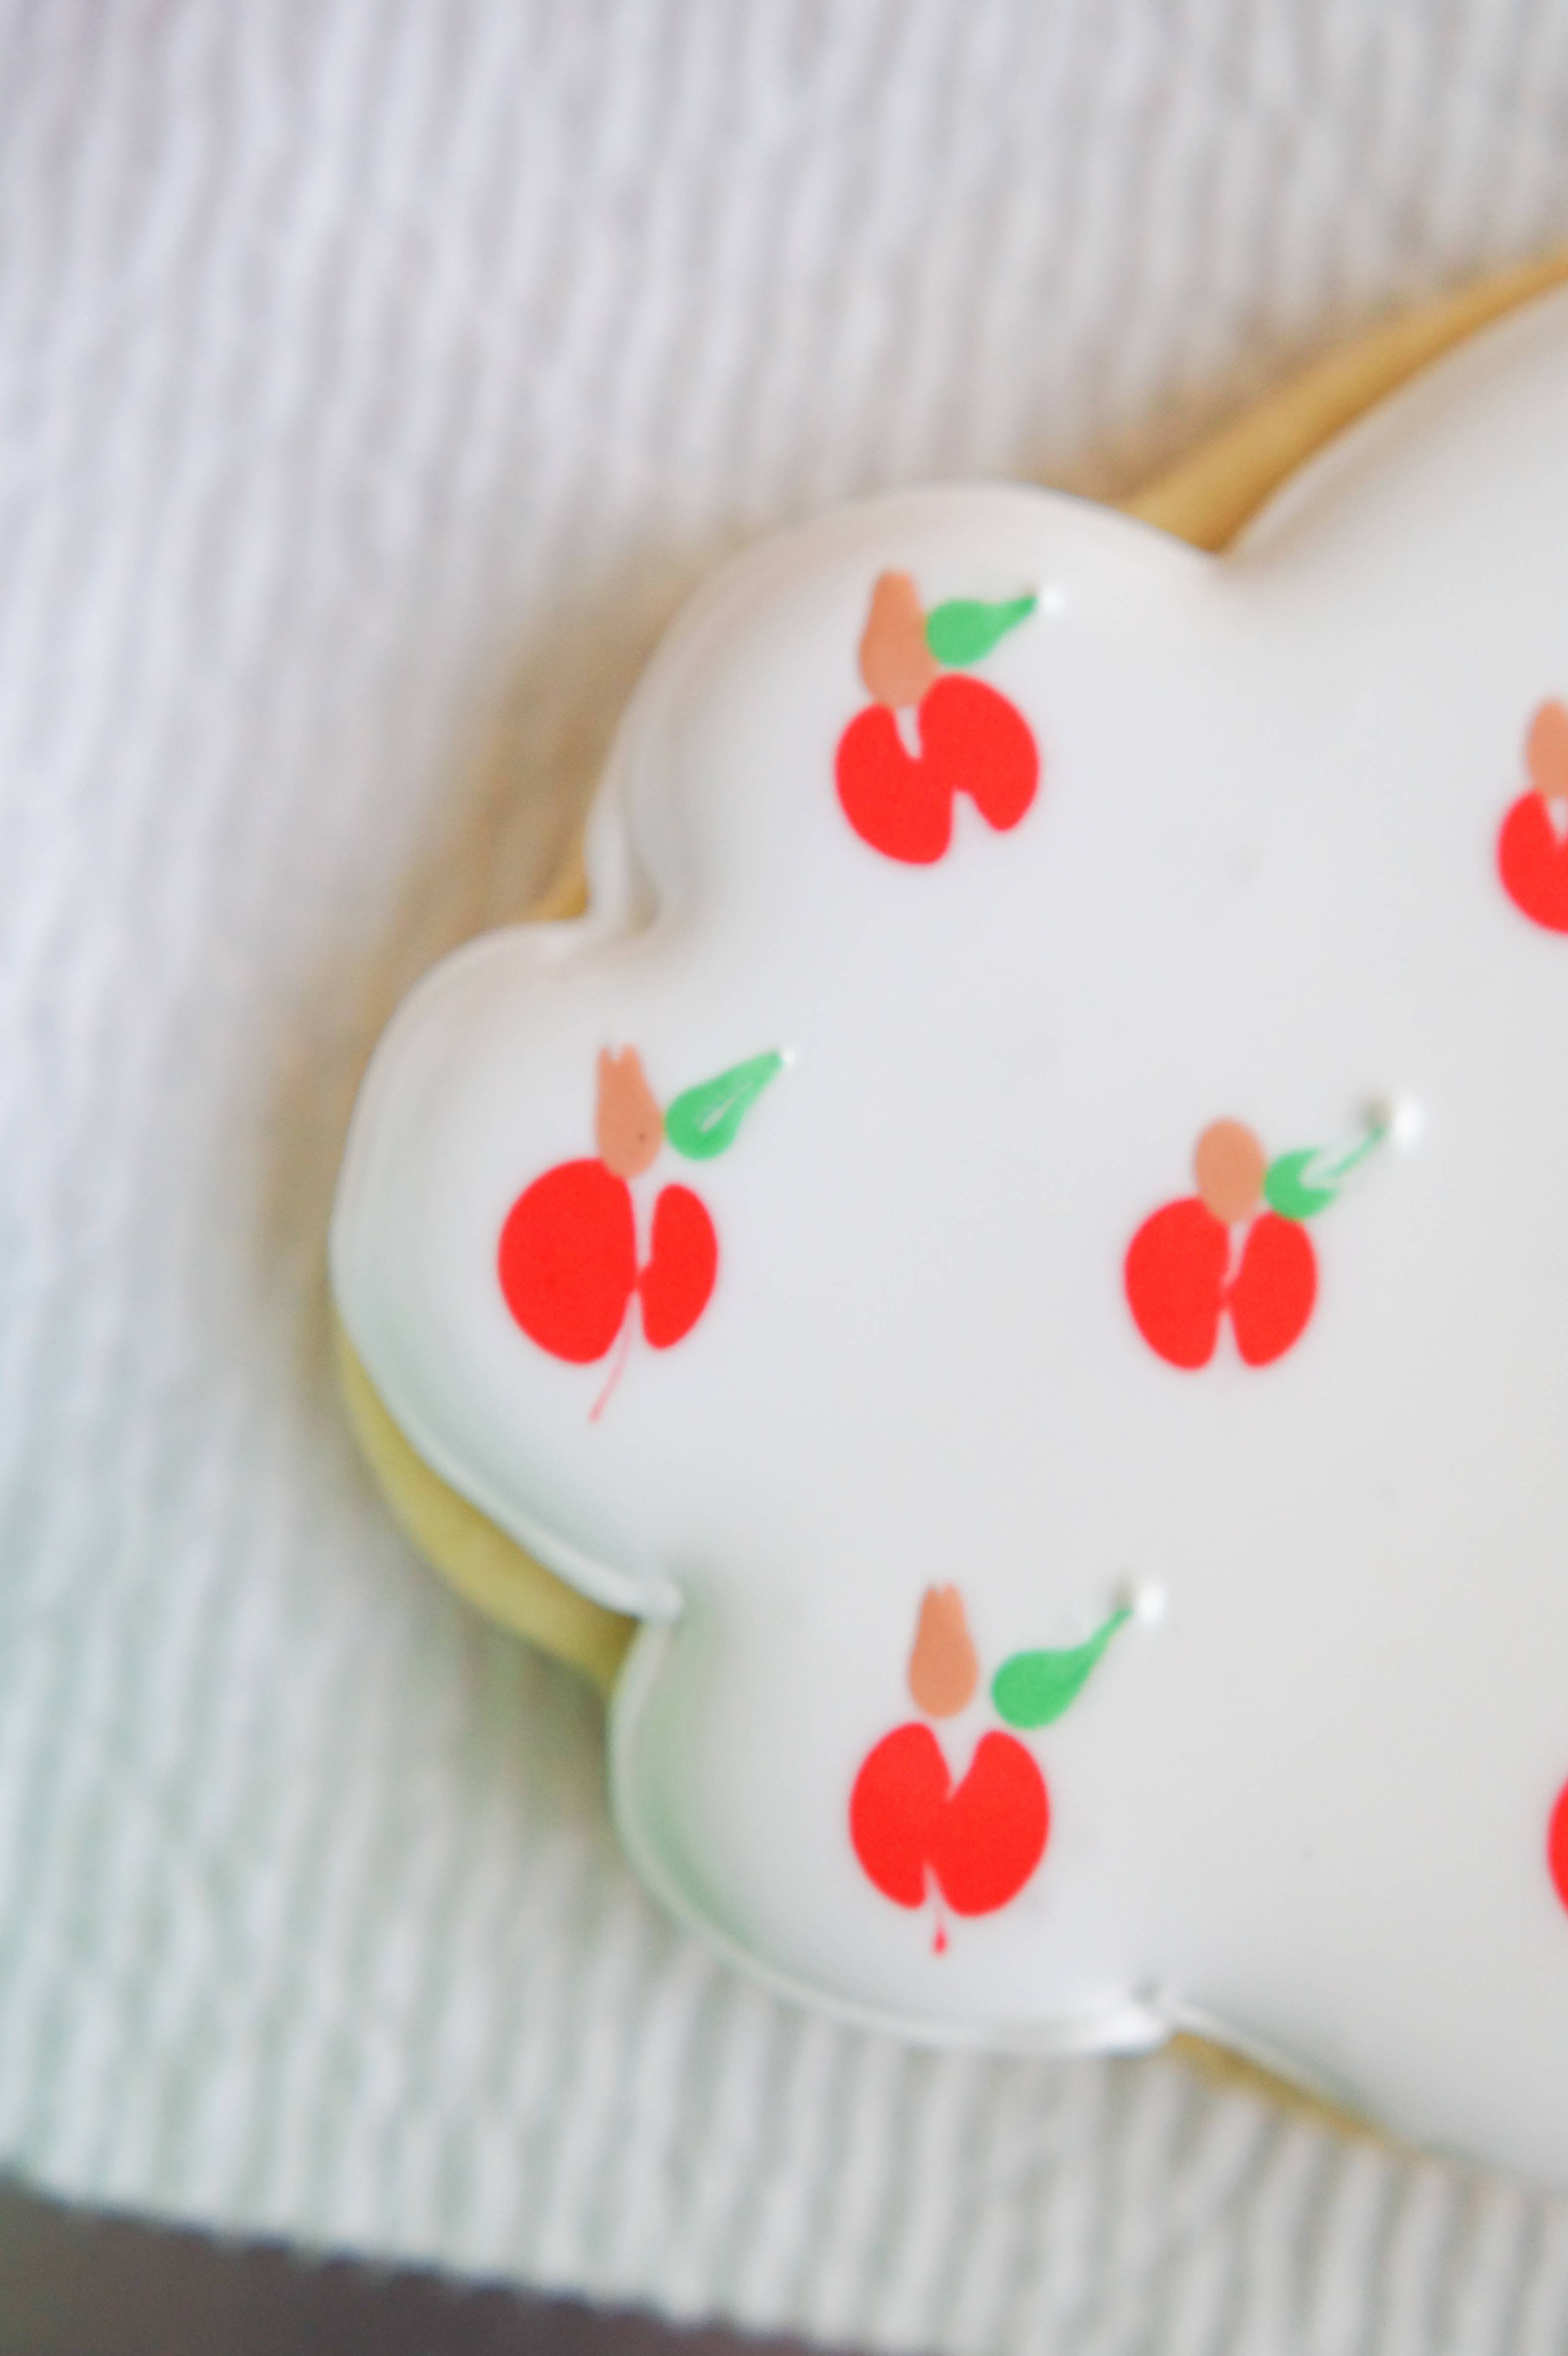
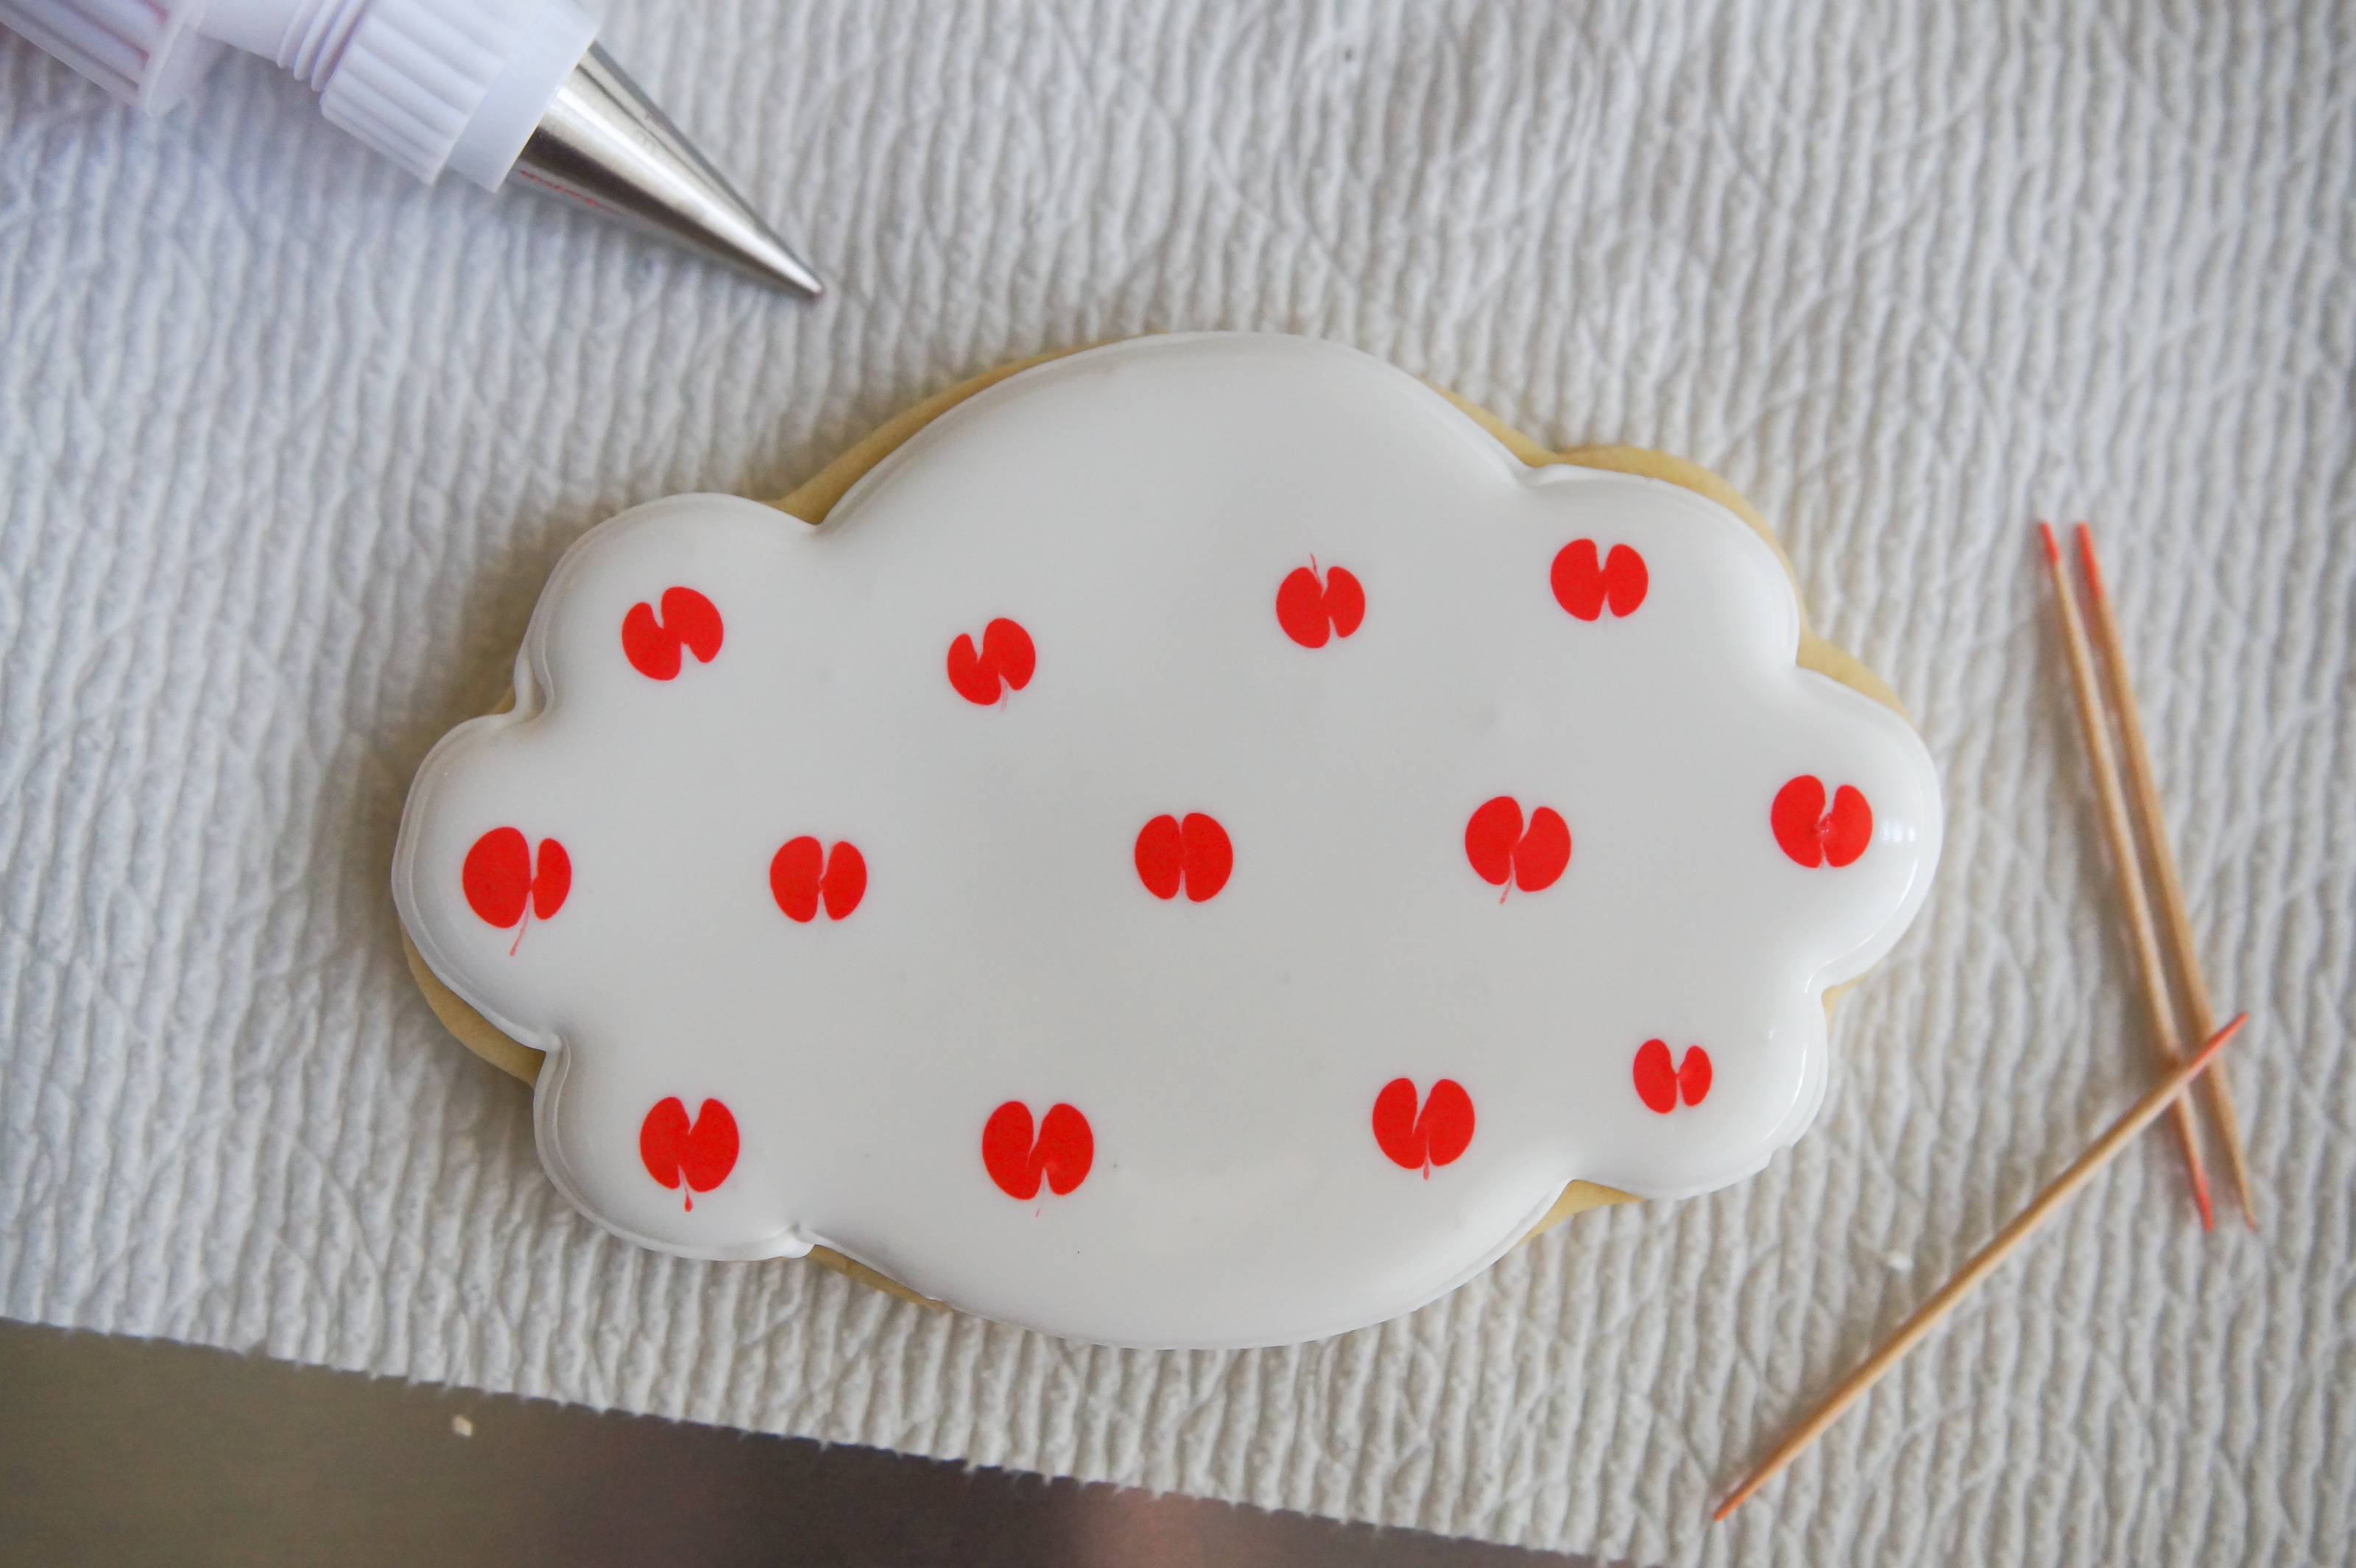
Add a small line of brown for the stems. Place a small drop of green next to the stems. Use a toothpick to swipe through the dots, forming a leaf shape. (Toothpick does not have to be wiped between swipes here.)
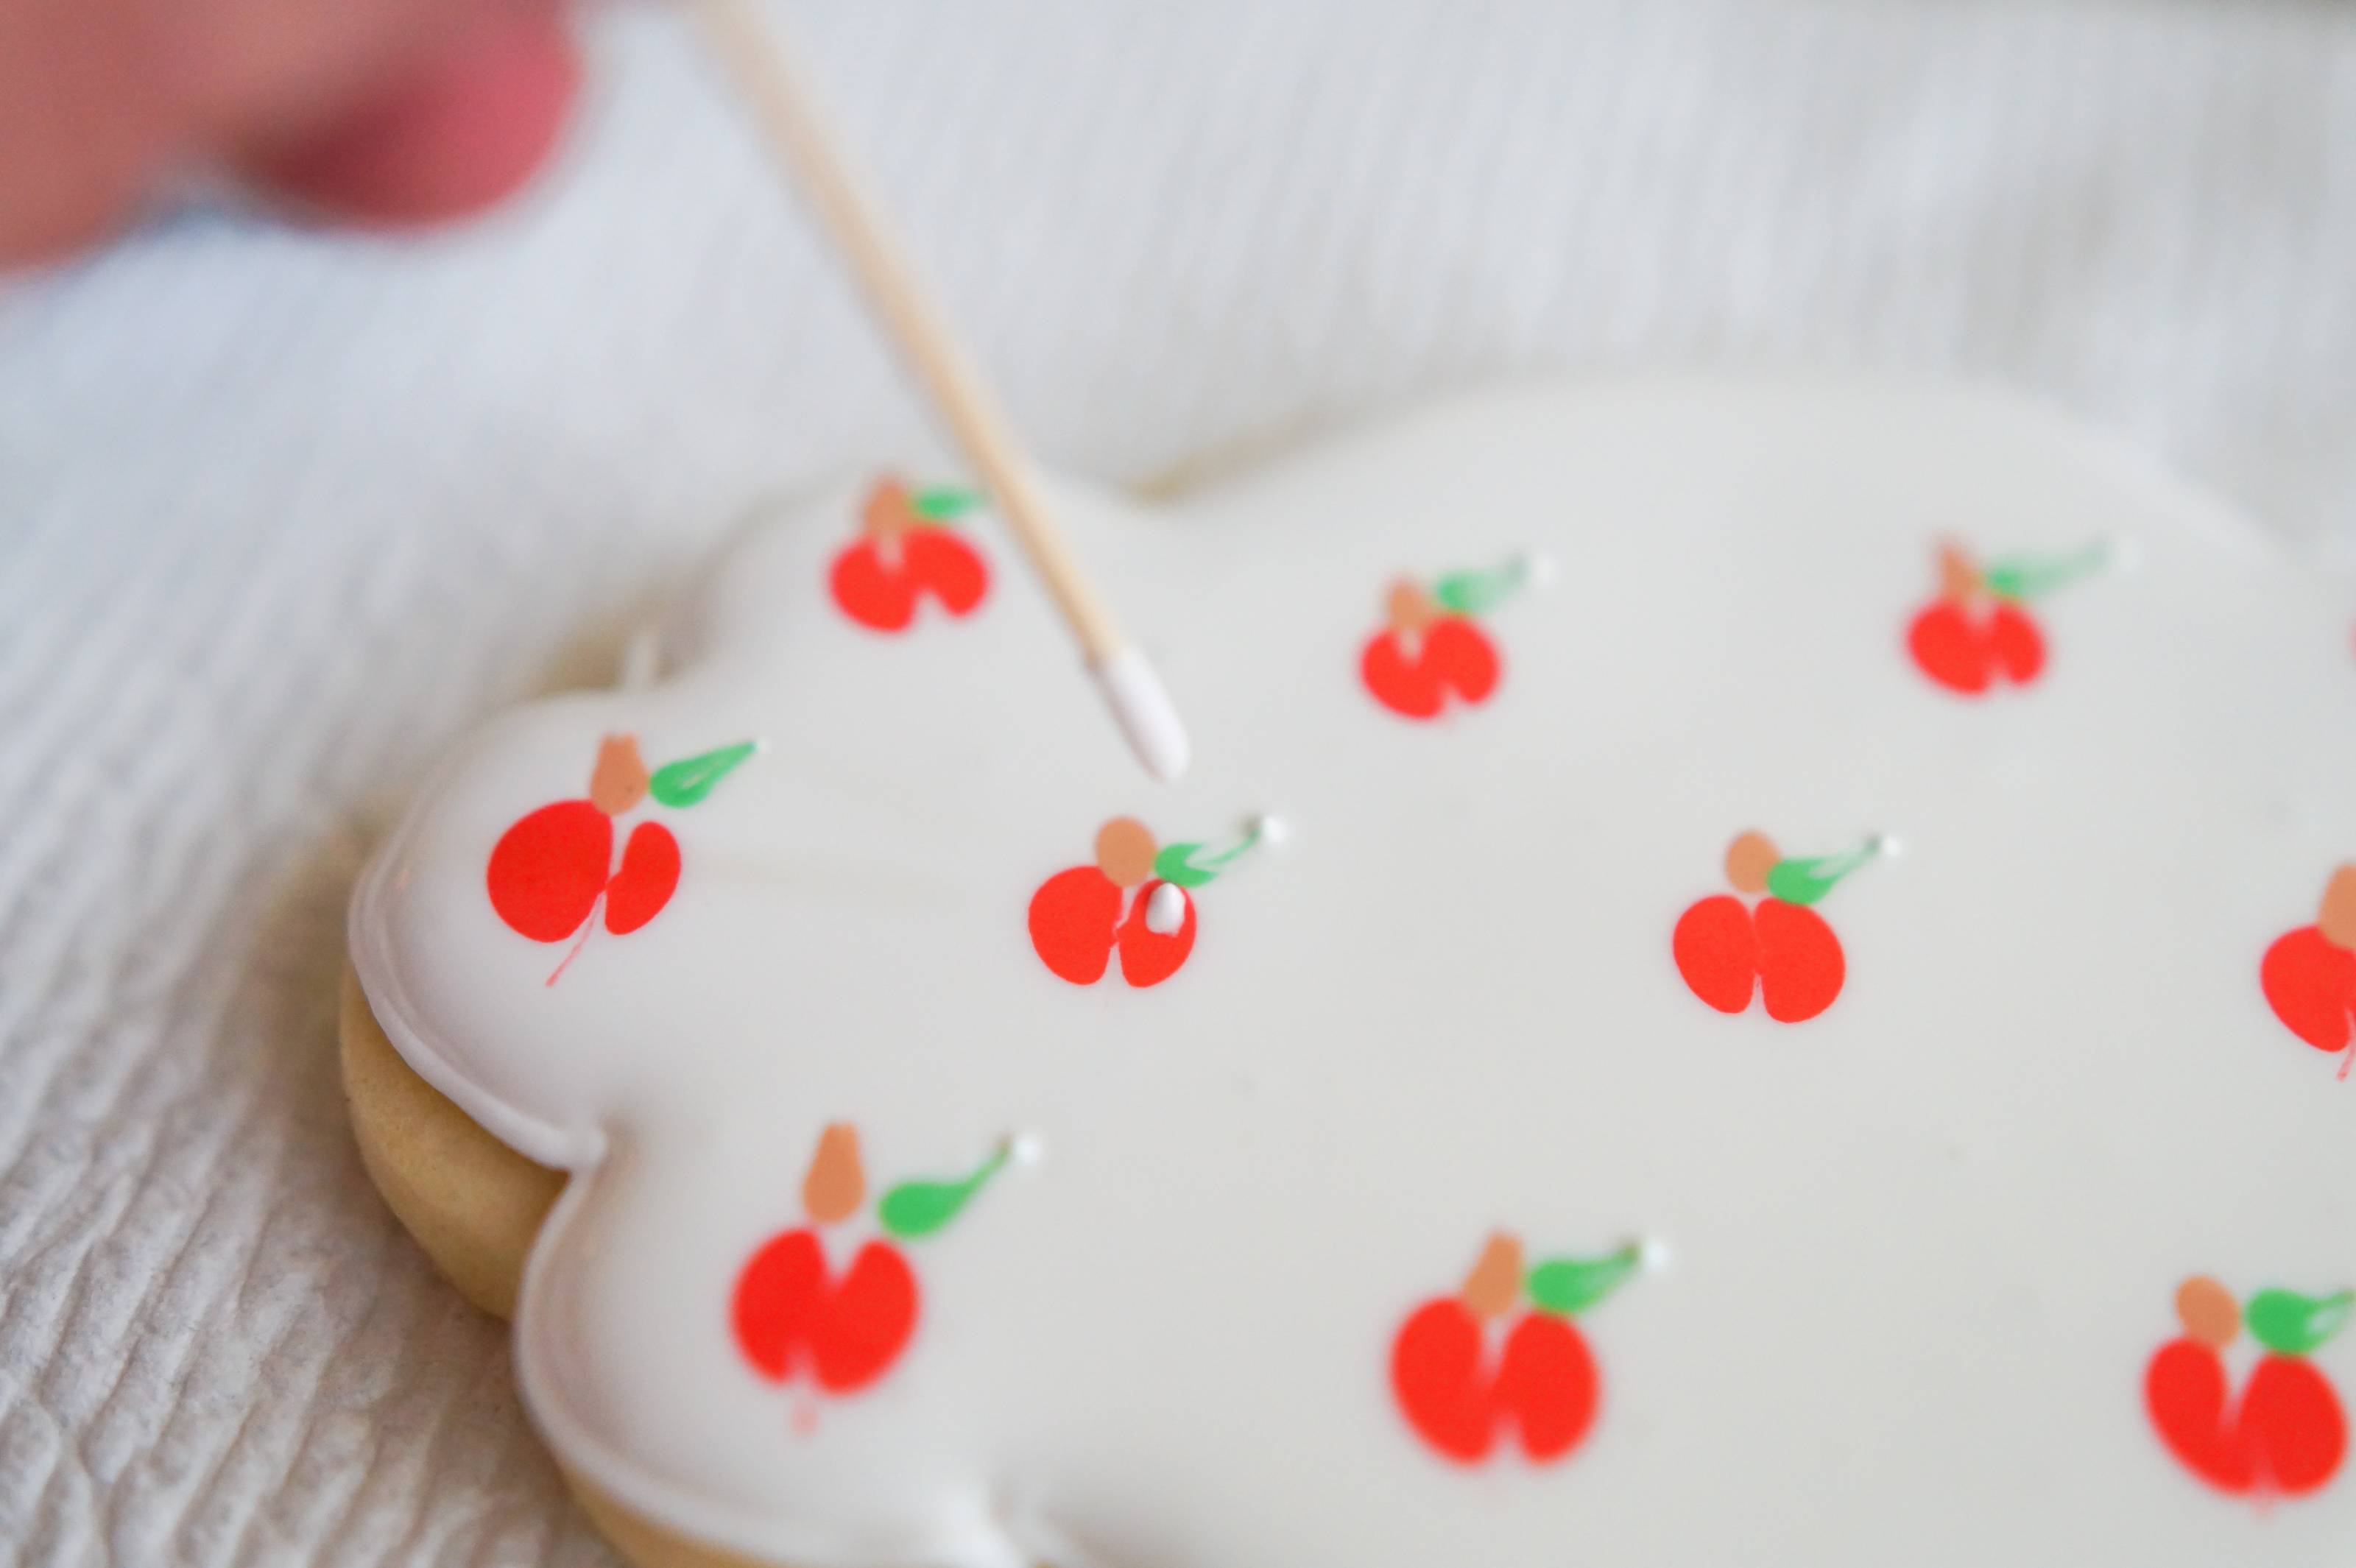
Pour some of the thinned white icing into a small ramekin. Dip a toothpick into the icing and add on top of the red to make a white highlight on the apples. Repeat with all of the cookies, working in groups of two. (Working two at a time rather than individually allows the white icing to set a bit, preventing bleeding.)
Let the cookies dry uncovered for 6-8 hours or overnight.
The next day, transfer the reserved piping consistency green icing to a piping bag fitted with a #1 tip. (If the icing has loosened too much overnight, stir in sifted powdered sugar to stiffen.)
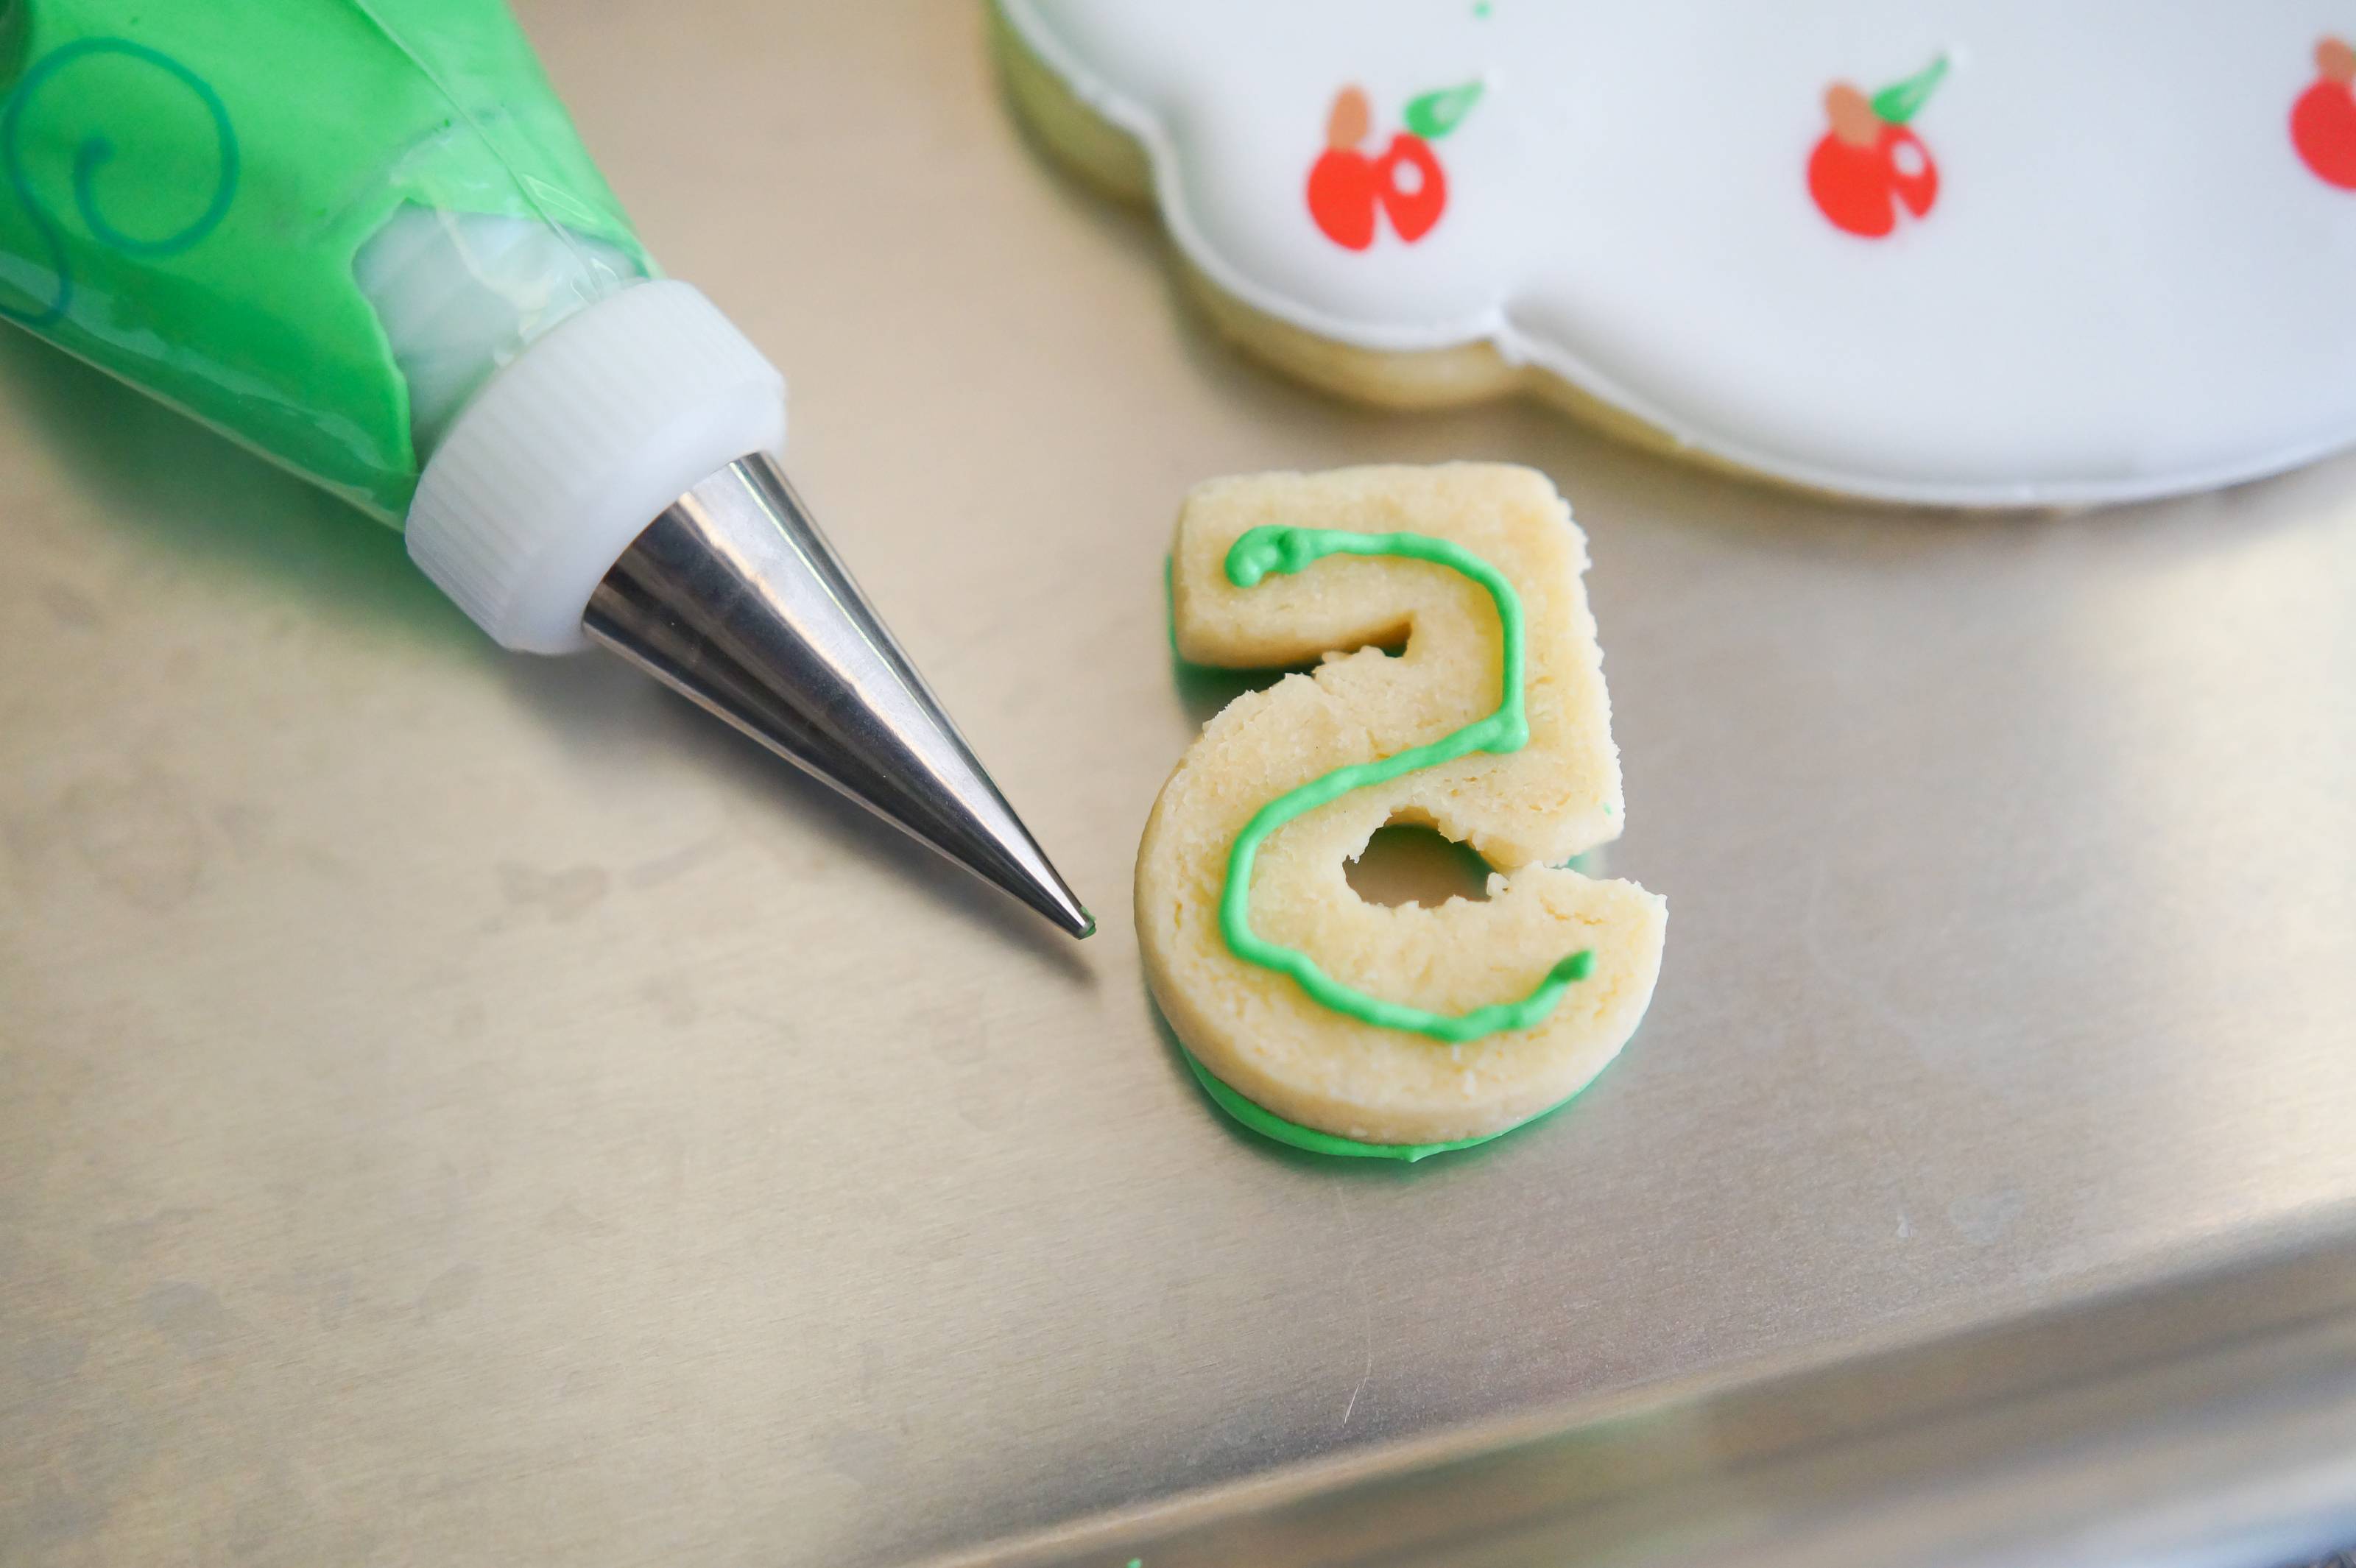
Pipe some of the icing on the back of the grade cookies and place onto the apple cookies.
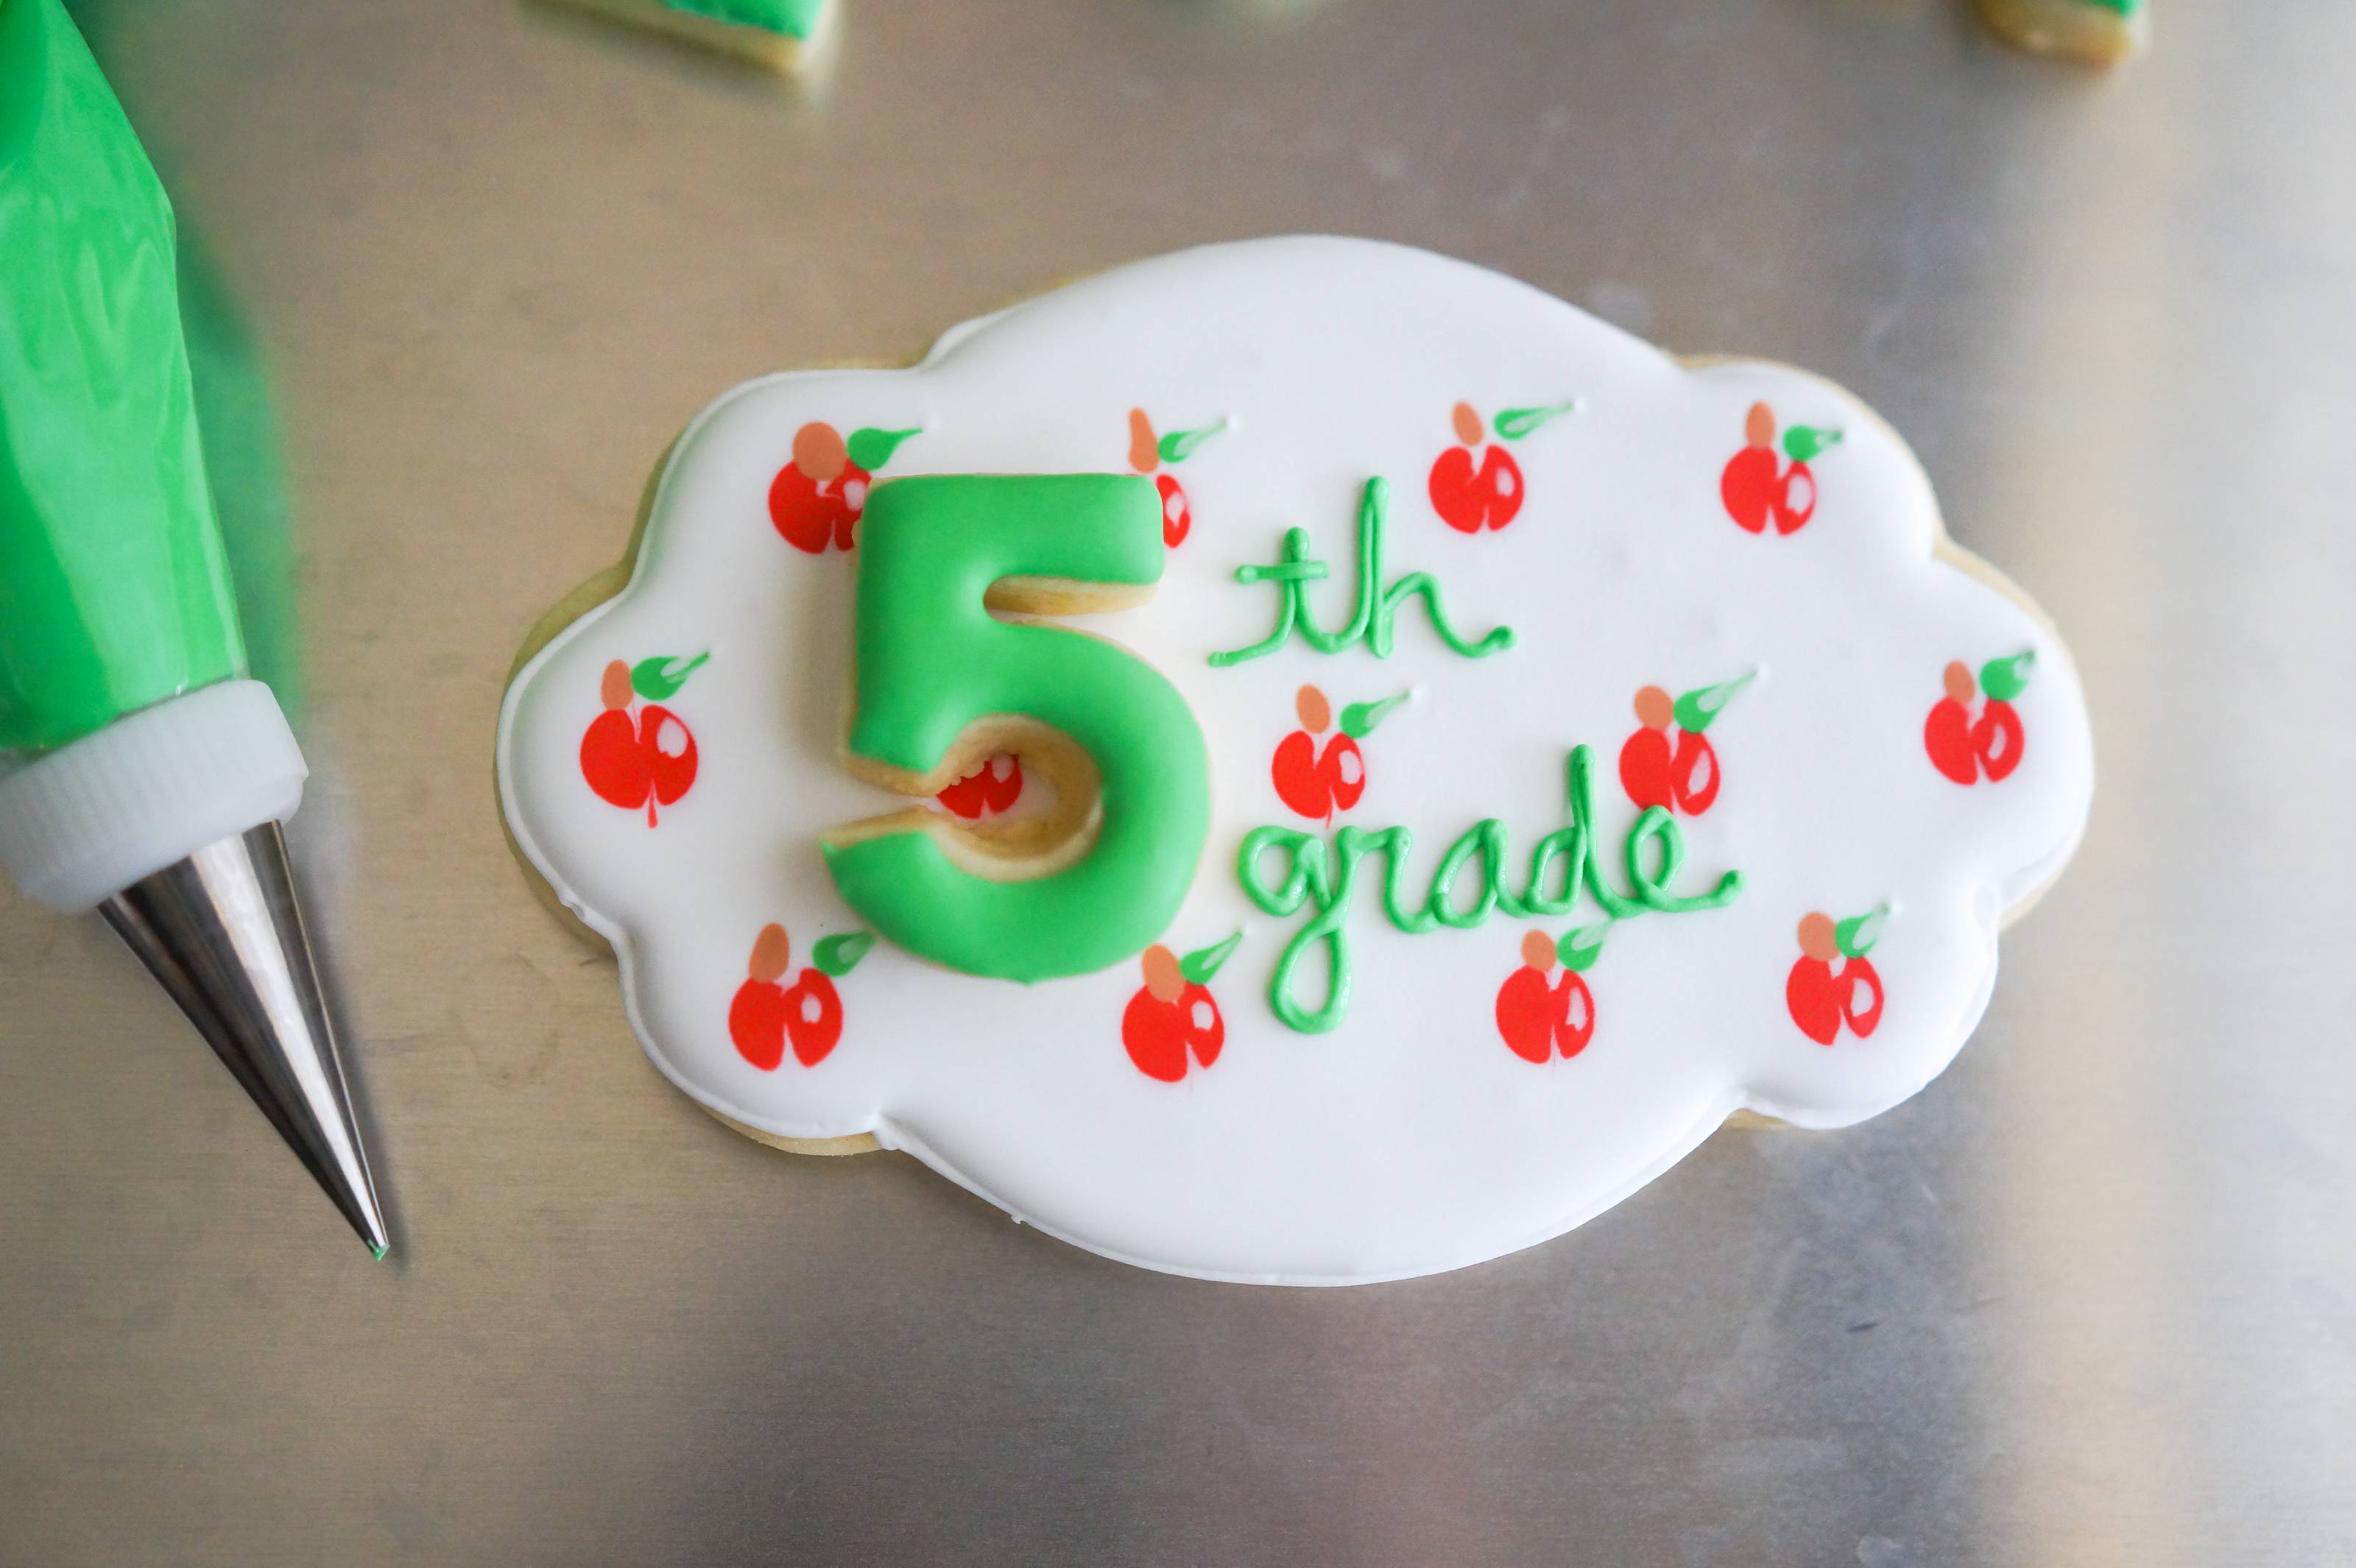
Use the #1 tip to pipe “th grade, “inder,” “rd grade,” etc. as needed. Let the icing set for at least one hour before stacking and packaging.

What is Meringue? French Meringue, Swiss Meringue & Italian Meringue Explained
If someone asked you, "what is meringue"? Would you say the light, piled-high, fluffy ...

Meringues and Divinities – Fluffy Holiday Favorites
Fluffy and white, clean and bright — that’s how we like our meringues and divinities. These...
How to Decorate Desserts with Flowers
Flowers abound in the South in spring and summertime, and they always seem to make everything...
Sign in or create an account
You need an account to like and rate recipes, comment, and share a recipe with the community.
Continue with Facebook