 then
then  Add IMPERIAL SUGAR to Home Screen
How to Make Holly Berry Decorated Cookies

Want to bake something special while making memories in the kitchen this season? Our friend and brand ambassador Bridget Edwards from Bake at 350 shows how easy these festive Holly Berry Decorated Cookies are to bake and decorate. Using food coloring pens and some strategically placed cinnamon candies, holly berry cookies are a breeze to decorate and will be the star of any Christmas goodie assortment. Cute Christmas cookies don’t have to be complicated!

Using food coloring pens and some strategically placed cinnamon candies, holly berry cookies are a breeze to decorate and will be the star of any Christmas goodie assortment! Cute Christmas cookies don’t have to be complicated!
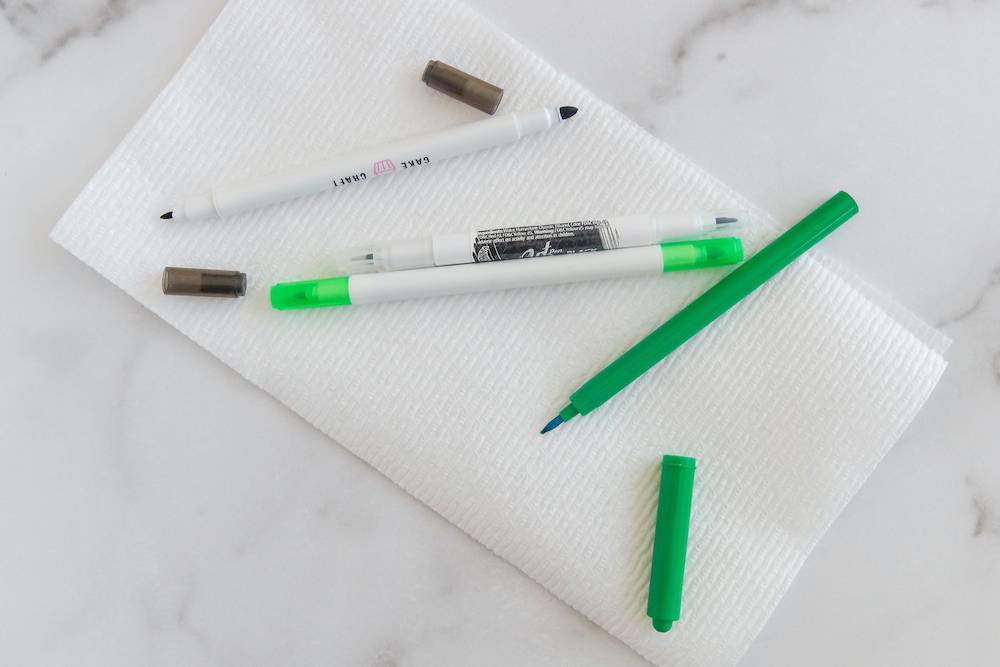
I’ll show you how to make these using three food coloring pens: light green, dark green, and black. Of course, these can be decorated using just one green food coloring pen.

Food coloring pens are handy to have in your cookie decorating arsenal – they make quick work of details, like adding a red nose on a Rudolf cookie or eyelashes on Mrs. Claus. They come in a variety of tip thicknesses; I find that a fine tip black pen is wonderful for adding definition. Find them in the baking section of any craft store or shop for a variety of brands online.
Alternatively, you can make a “watercolor” of sorts using gel paste food coloring and clear alcohol like vodka or Everclear. Mix a drop of food coloring with a little alcohol until it’s the consistency for painting. Use a food-only paintbrush to apply to the cookie.

The holly berries are small cinnamon candies. Look for these in the baking area of your craft or grocery store. (My grocery store carries them at the holidays.) You can also use the small cinnamon candies from the candy aisle.
To make the holly berry cookies, you’ll need:
- Imperial Sugar Classic Sugar Cookie recipe
- Imperial Sugar Royal Icing recipe
- White gel paste food coloring (optional)
- Disposable piping bag
- Icing coupler and #2 or 3 icing tip
- Squeeze bottle
- Toothpicks
- Cinnamon candies
- Food coloring pens (two shades of green, one black fine-tip)
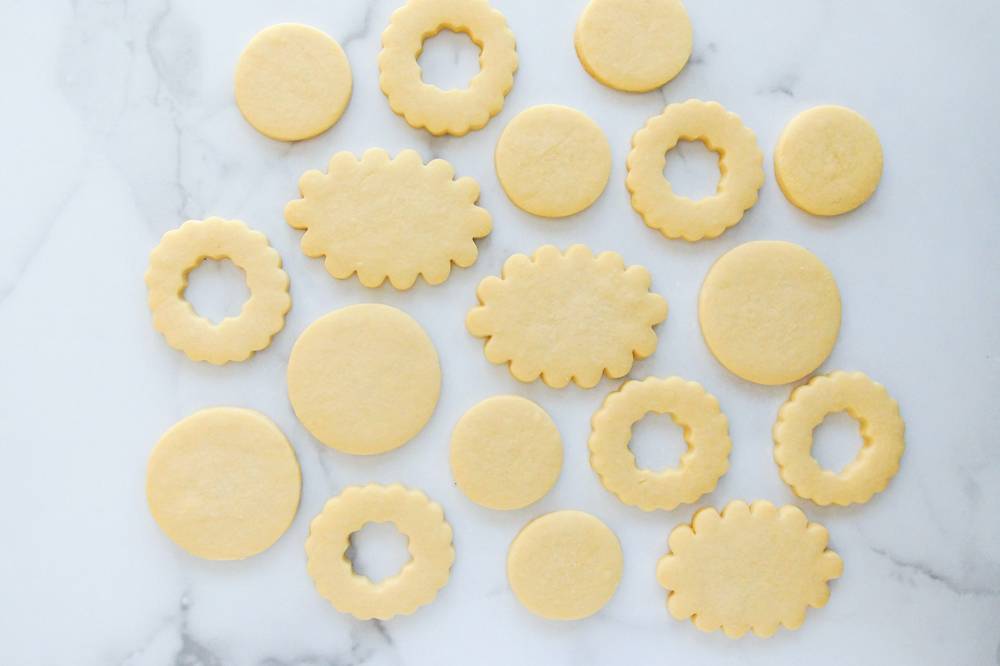
Bake the cookies using round or oval cookie cutters. I used a mix. The wreath shapes were made using a graduated scalloped circle cookie cutter set.
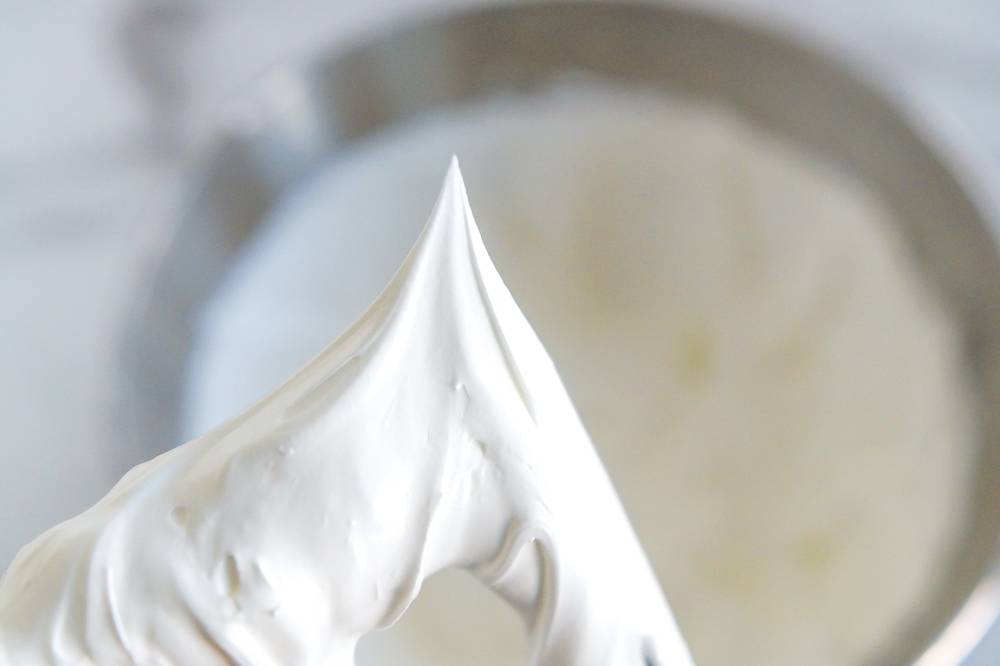
Make royal icing. Tint white if desired. This will keep the icing from going ivory as it can sometimes do, but it’s not strictly necessary.
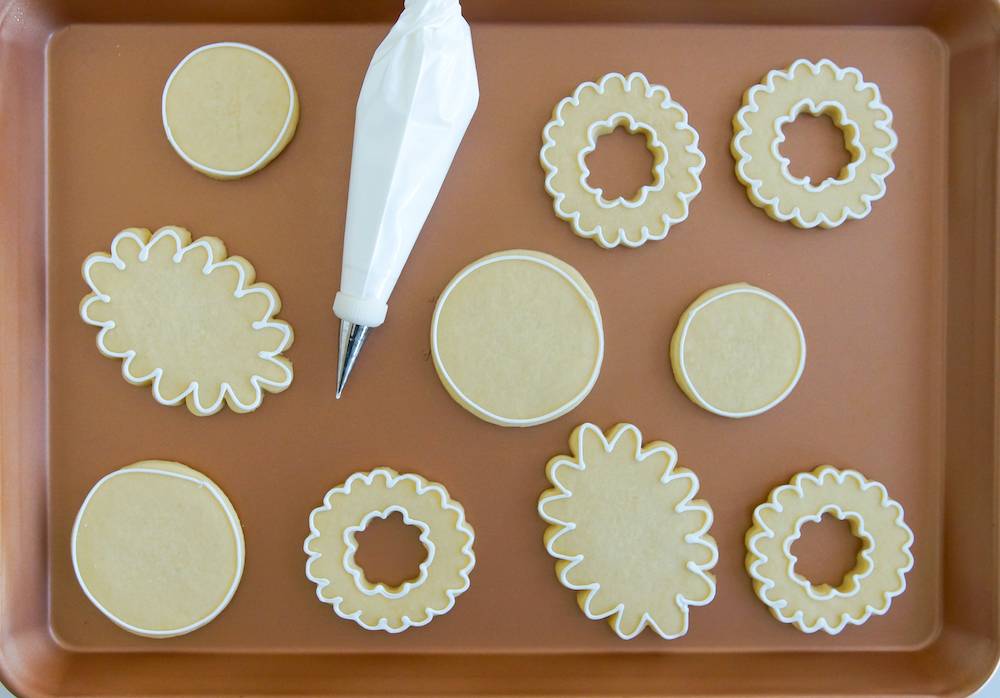
Spoon the icing into a piping bag fitted with a plain tip. Outline the cookies.
Thin the remaining icing with water, a bit at a time, gently stirring until it is the consistency of glue. A ribbon of icing dropped back into the bowl should disappear in a count of three seconds. Adjust the consistency if needed with more water or sifted confectioners’ sugar.
Cover the thinned icing with a damp dishtowel and let sit for a few minutes. Stir gently to pop large air bubbles and pour into a squeeze bottle.
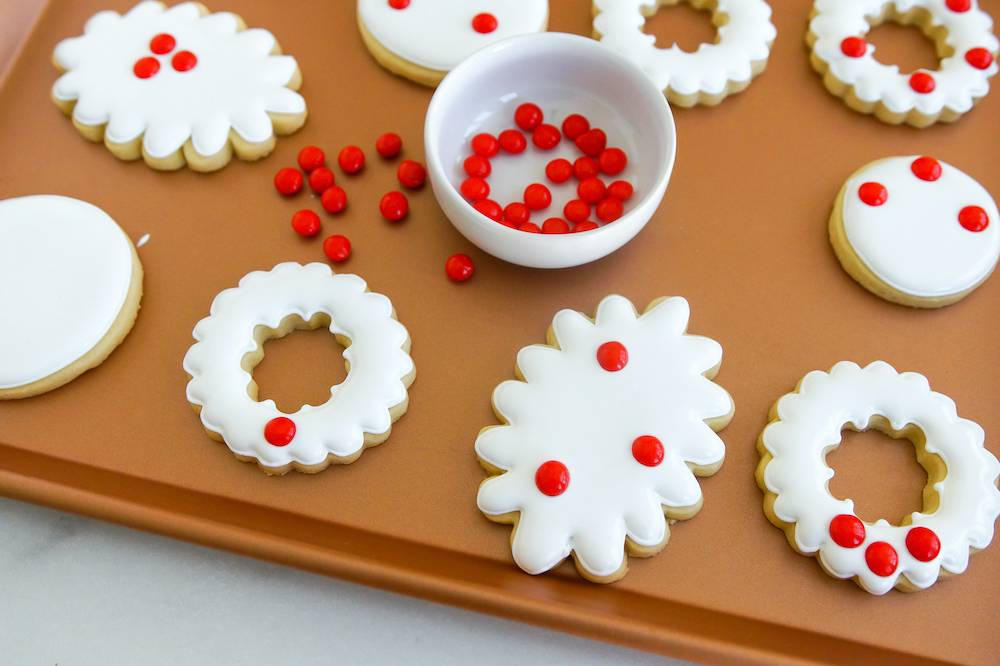
Fill in the outlines on the cookies. While the icing is still wet, drop cinnamon candies onto the icing. Let the icing dry uncovered for 6-8 hours or overnight. The icing MUST be completely dry before using the food coloring pens.
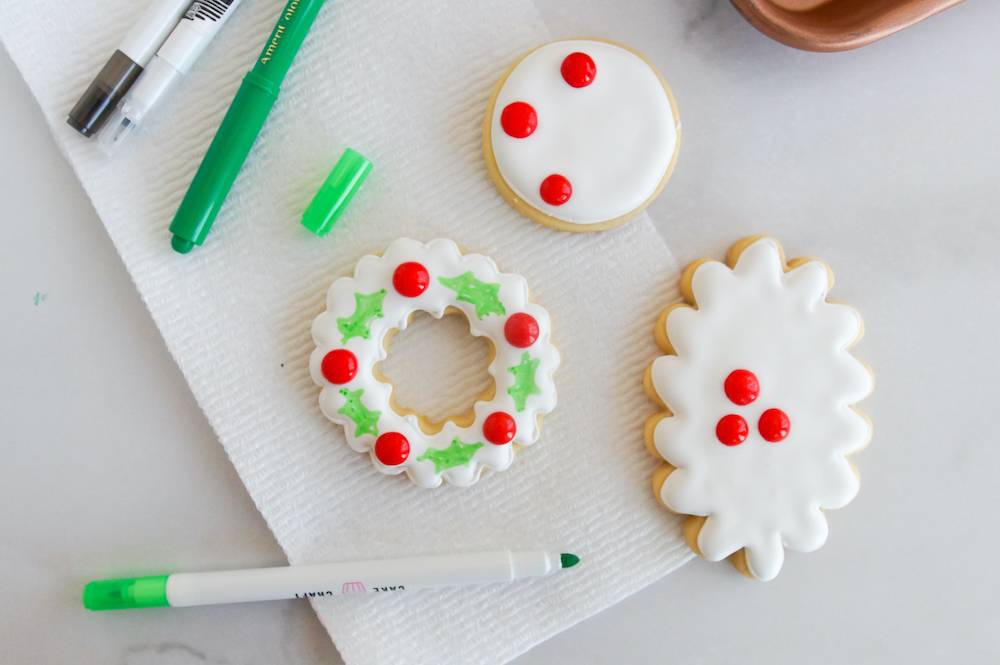
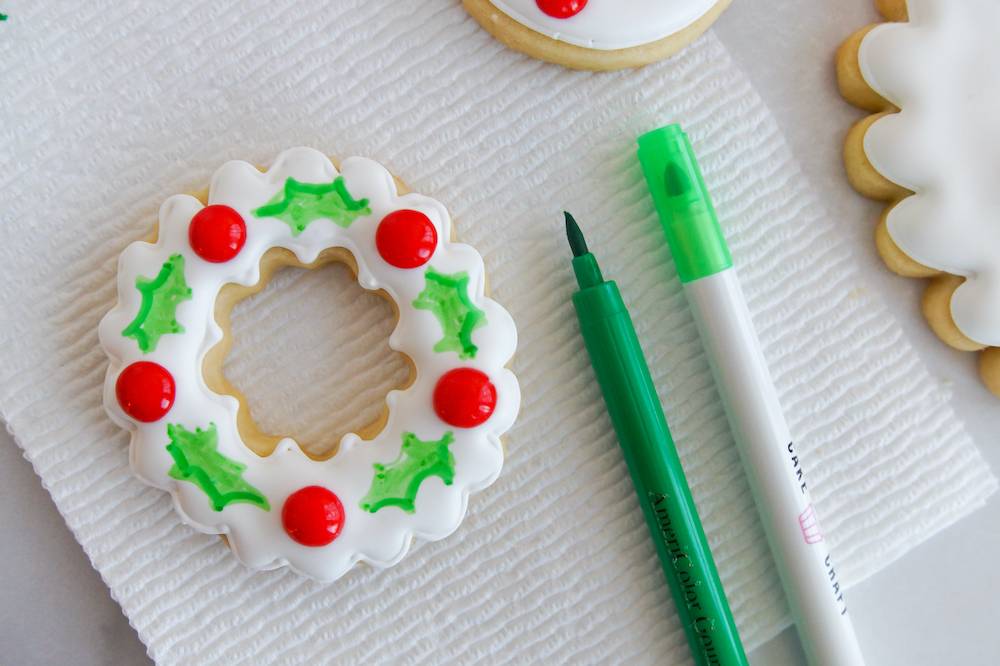
Once dry, use the food coloring pens to add holly leaves. I started with the lighter color green, then added shading with the darker green. Don’t worry about being perfect. This is a watercolor effect and will have some imperfections.


If available, use a fine tip black food coloring pen to add details. While not required, the black adds a whimsical touch!
The food coloring pen markings will dry quickly, and the cookies are ready for stacking to packaging – and eating!

Merry Christmas and happy cookie-ing!
PIN IT NOW


How to Make Pecan Pie Decorated Cookies
Help us welcome our friend and brand ambassador Bridget Edwards. Bridget has been our guest...

How to Make Fang Decorated Halloween Cookies
Our friend and brand ambassador Bridget Edwards conjured up a decorated cookie...

Six Secrets to a Stressless Thanksgiving Meal
Does the thought of creating a Norman Rockwell, picture-perfect Thanksgiving meal make you...
Sign in or create an account
You need an account to like and rate recipes, comment, and share a recipe with the community.
Continue with Facebook