then
then  Add IMPERIAL SUGAR to Home Screen


Ingredients
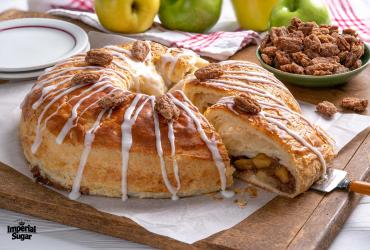
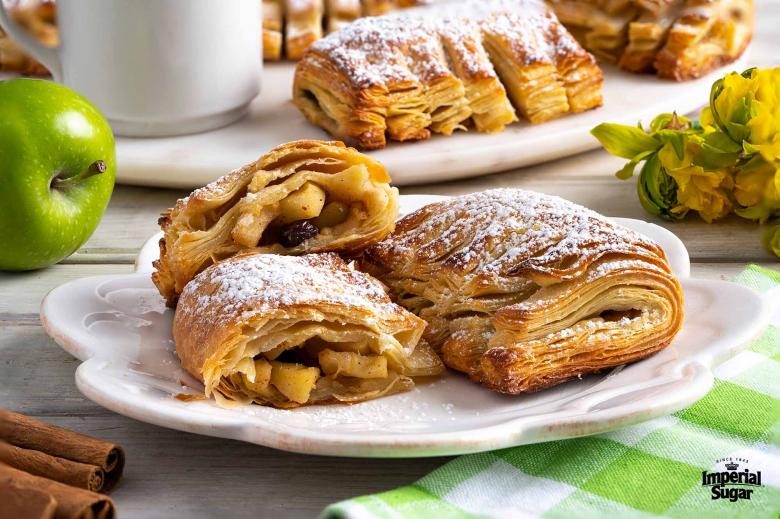
Ukrainian Style Easter Danish Dough
- 1/4 cup lukewarm water
- 3 tablespoons instant yeast
- 6 cups bread flour*
- 7 large eggs
- 1/3 cup + 1 tablespoon Imperial Sugar Extra Fine Granulated Sugar
- 1 tablespoon + 2 teaspoons salt
- 1 tablespoon vanilla extract
- 12 tablespoons unsalted butter, soft
- 26 tablespoons unsalted butter, European style highly recommended, very cold
Apple Filling
- 6 tablespoons Imperial Sugar Extra Fine Granulated Sugar
- 4 Granny Smith apples, must be at room temperature
- 1/3 cup raisins
- Pinch salt
- 2 teaspoons cinnamon
- 1 teaspoon vanilla extract
- Zest of 1 lemon
Vanilla Glaze
- 1 1/4 Imperial Sugar Confectioners Powdered Sugar
- 2 tablespoons water
- 1 tablespoon unsalted butter, melted
- 1 teaspoon vanilla extract
- *Spoon & Sweep method: Use a spoon to fill measuring cup with flour until required amount is obtained. Scooping measuring cup directly into flour bag will firmly pack flour resulting in too much flour required for recipe.
Directions
- In a bowl of an electric mixer combine water and yeast. Add flour, eggs, sugar, salt, vanilla, and soft butter. Do not add remaining 26 tablespoon cold butter at this stage. Using a dough hook, mix to a very firm and elastic dough, about 7 minutes on low-medium speed. If dough feels soft, add flour to make it very firm. Ensure that dough does not exceed 82°F. Protein strands break down above that temperature and dough would become very sticky.
- Remove from machine and place dough on a plastic food film lined cookie sheet. Cover dough with plastic and place in freezer for 1 hour. Move dough to refrigerator until following day.
- Apple filling can be made today or tomorrow.
- Peel apples and cut in quarters. Remove core and cut lengthwise in half. Cut each wedge crosswise in 8 slices.
- Place sugar in a large sauté pan and place over medium high heat. Stir dry sugar using a flat bottom wooden spoon or a heat resistant spatula to a light golden/honey color caramel.
- Add cut apples and stir to evenly coat apples. Stir for several minutes until caramel has melted and apples are tender. If some stubborn caramel chunks remain, remove from heat anyway and discard those pieces.
- Add raisins, salt, cinnamon, vanilla, and lemon zest. Place in refrigerator to chill.
- Next day, place cold butter sticks next to each other on a large piece of parchment paper.
- Using a rolling pin, pound butter until size of a standard size piece of copy paper. (8 x 11 inches). Place in refrigerator to make cold and firm again.
- Remove cold dough from refrigerator. Using a small amount of flour roll to size of 2 sheets of paper.
- Place cold butter on very left side of rolled out dough. Flip right side of dough onto butter. Return to freezer for 20 minutes.
- Roll dough to 4 sheets of paper long. Fold dough into 3 by folding left one third of dough onto middle one third and folding right one third onto middle. Place in freezer for at least 1 hour or in refrigerator for 2 hours.
- After 1 hour chilling repeat step 12 completely.
- Once again after 1 hour chilling repeat step 12 completely. Set aside 3-4 cookie sheets lined with parchment paper.
- Allow dough to chill at least one hour. Cut dough in half and leave one half in refrigerator.
- On a lightly floured surface roll dough into a rectangle 25-inches long and 10-inches wide. If dough starts to get soft, place it on a cutting board or cookie sheet in freezer for about 10 minutes. This will keep butter layers intact and ensure a flaky product.
- Cut dough in squares 5 x 5 inches. Brush a very thin coat of water on edges of squares.
- Place about 3 tablespoons of apple filling in center of each square. Fold over to create a pocket. Gently press edges to seal but do not damage dough layers.
- Place 2 inches apart on cookie sheets. Repeat with remaining dough.
- Using a sharp knife, make 1/2-inch-deep cuts in long side of Danish.
- Loosely drape Danish with plastic food wrap (not tightly to ensure proper expansion) and place in a warm place until Danish have almost doubled. (Do not be tempted to proof them quickly in a preheated oven). Danish need to be proofed in a room of about 75°F. If room is colder, it will just take a little longer to proof.
- When Danish have gained about 60% in volume turn on oven to 375°F.
- Beat one egg and a tablespoon of milk or water and brush Danish very gently with egg wash. Place in oven and after 10 minutes reduce oven temperature to 350°F. Bake for a total of about 18-22 minutes or until well golden brown.
- Danish should be a minimum of deep golden and well browned in many areas. Under baked Danish will not be flaky crisp.
- For vanilla glaze whisk ingredients until combined. Brush or drizzle on surface of Danish. Sprinkle with powdered sugar if desired.
Imperial Sugar Insight
- Preparing Danish at home requires patience as this dough needs proper chilling time to obtain a flaky result. We recommend using European style butter (made in America) as this type of butter produces better results. It is also the butter used by professional bakers for preparing Danish.
- Protein in flour has a huge impact on how much water the dough will absorb. Brands of bread flour differ on protein content. (Between 11-13 %) No matter which brand of flour used, dough needs to feel very firm at end of mixing. Soft dough will not provide flaky results.